Using student access

An important feature of the InThinking website is the ability to give your students access to a range of resources. These include the eBook, ATL activities, case studies, exam practice questions, sample answers, revision materials, interactive quizzes, dynamic Quizlets, and other learning resources.
You decide which pages your students can access and can add or remove content whenever you wish. Also, it is free to share these resources with your students!
This page explains how to set up classes so that your students can access the resources on this website that you would like them to use.
Student Access allows you to share selected resources directly with your students, while keeping you in control of what they can see. Setting this up is quick and straightforward.
Setting up Student Access
Watch this short video to learn about how to set up Student Access. Many thanks to Paul Lloyd from InThinking Central for putting this together.
How to set up Student Access
1. Go to the homepage
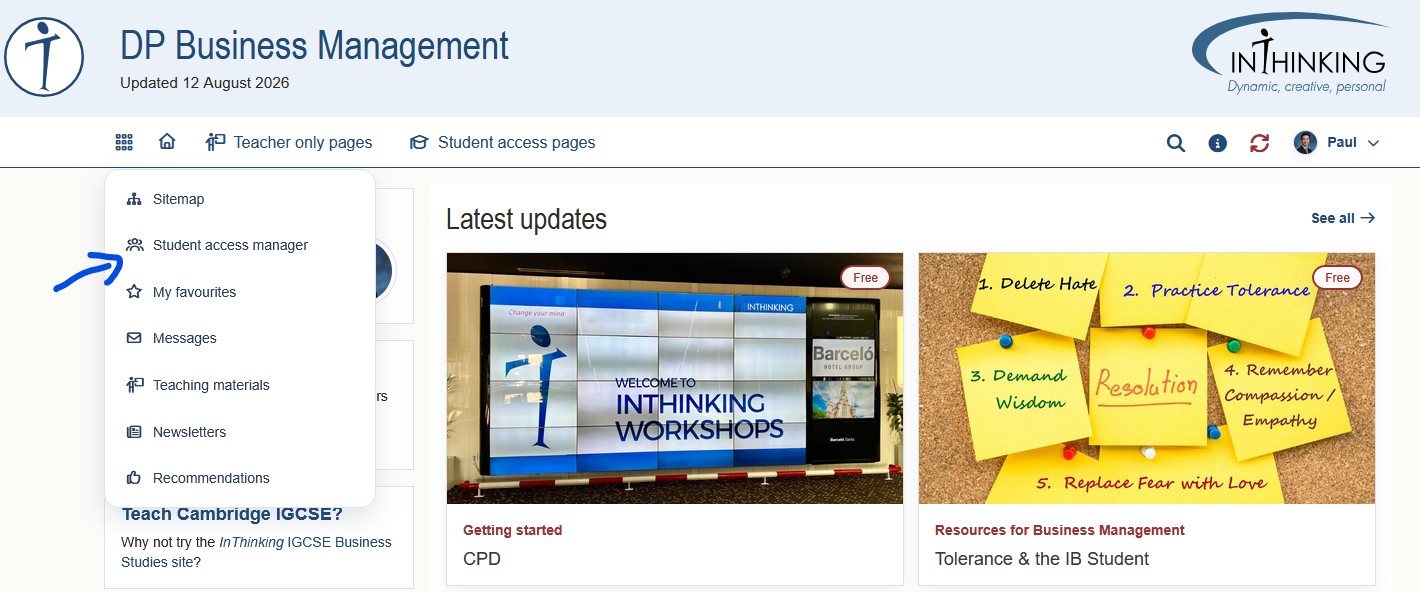
From the masthead bar on the homepage, click on the “Student access manager” button.
2. Create a group
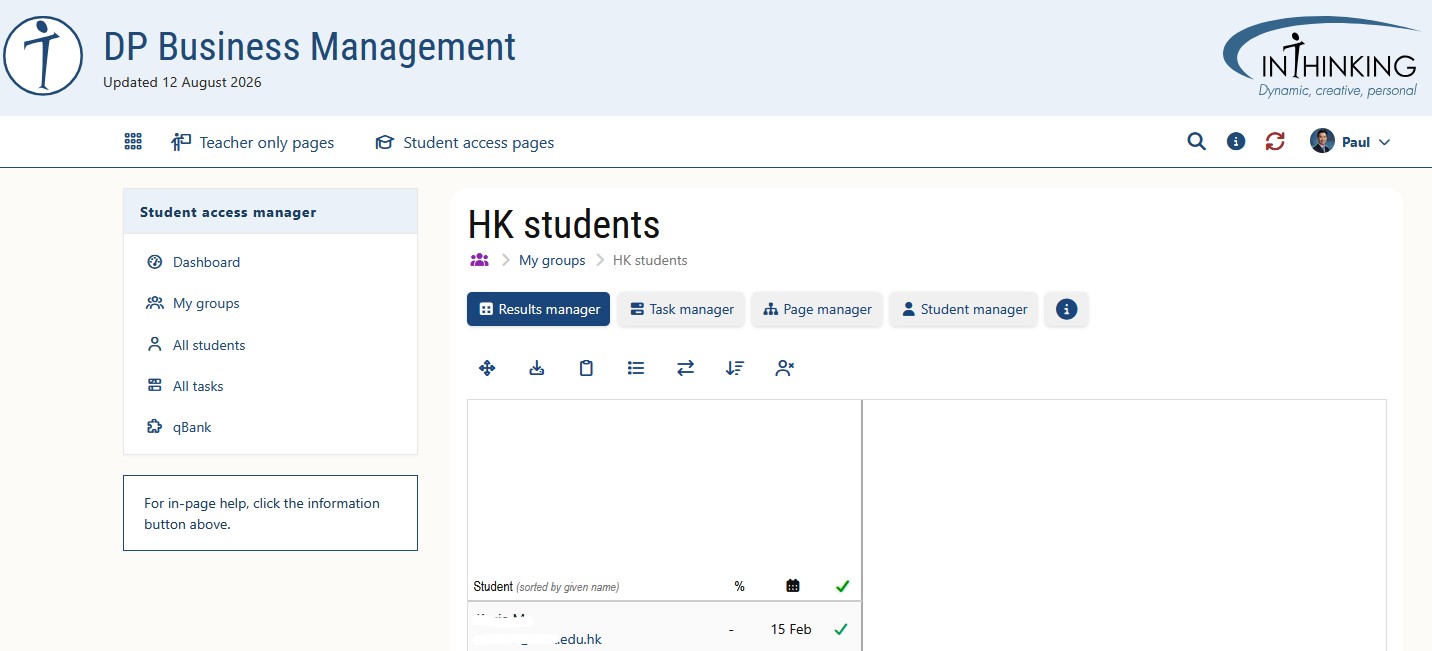
Click on “My groups”. You will be taken to a page where you can create a new group. Give your group an appropriate name and description, then click “Next”.
For example, you might create separate groups for DP1 Business Management, DP2 Business Management, or individual classes that you teach.
3. Choose the resources your students can access
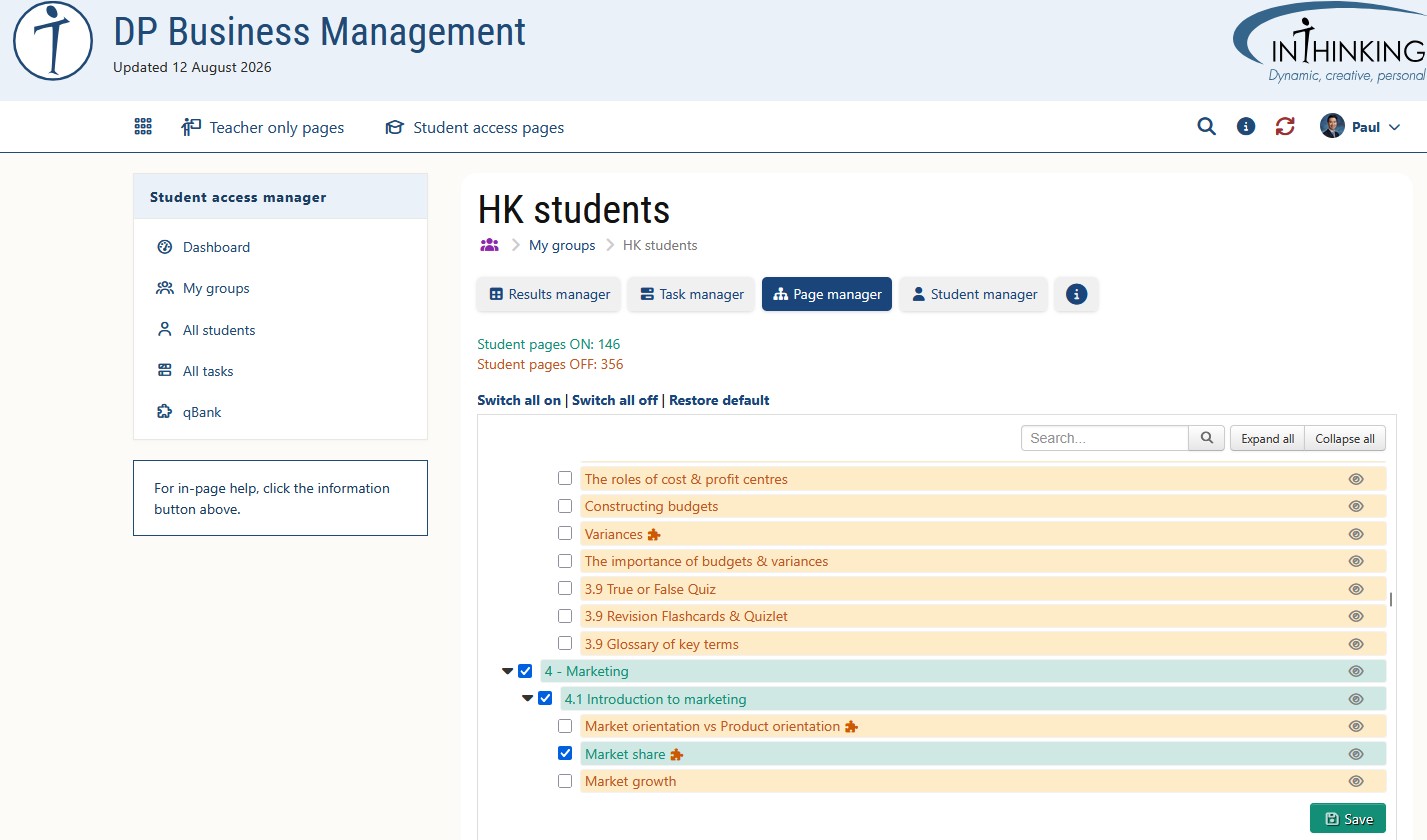
You will now be asked to select the pages that you would like your students to see.
You might choose to give students access to particular units of the course, revision materials, examination practice, or other resources relevant to what they are currently studying. You do not need to select everything at once – you can return and add more pages whenever you wish.
Once you have selected the pages, click “Save”.
4. Invite your students
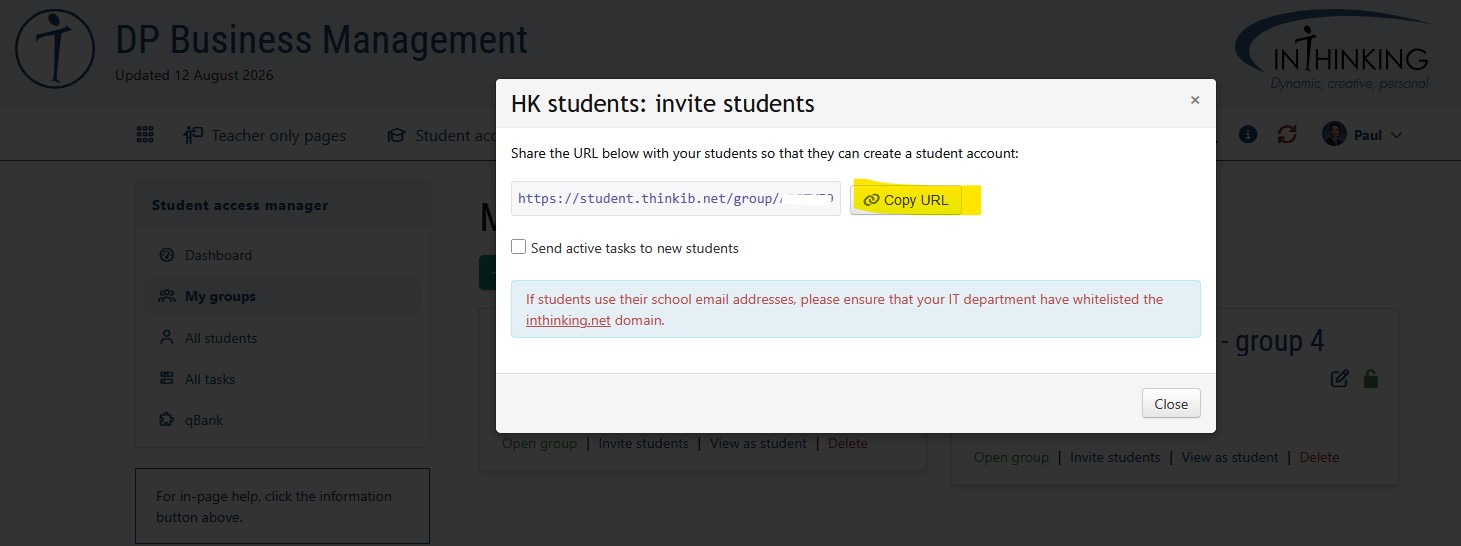
You will now be given a web link to share with your students. Students use this link to set up their account and join your class.
Once they have joined, they will be able to access the Business Management resources that you have selected for their group.
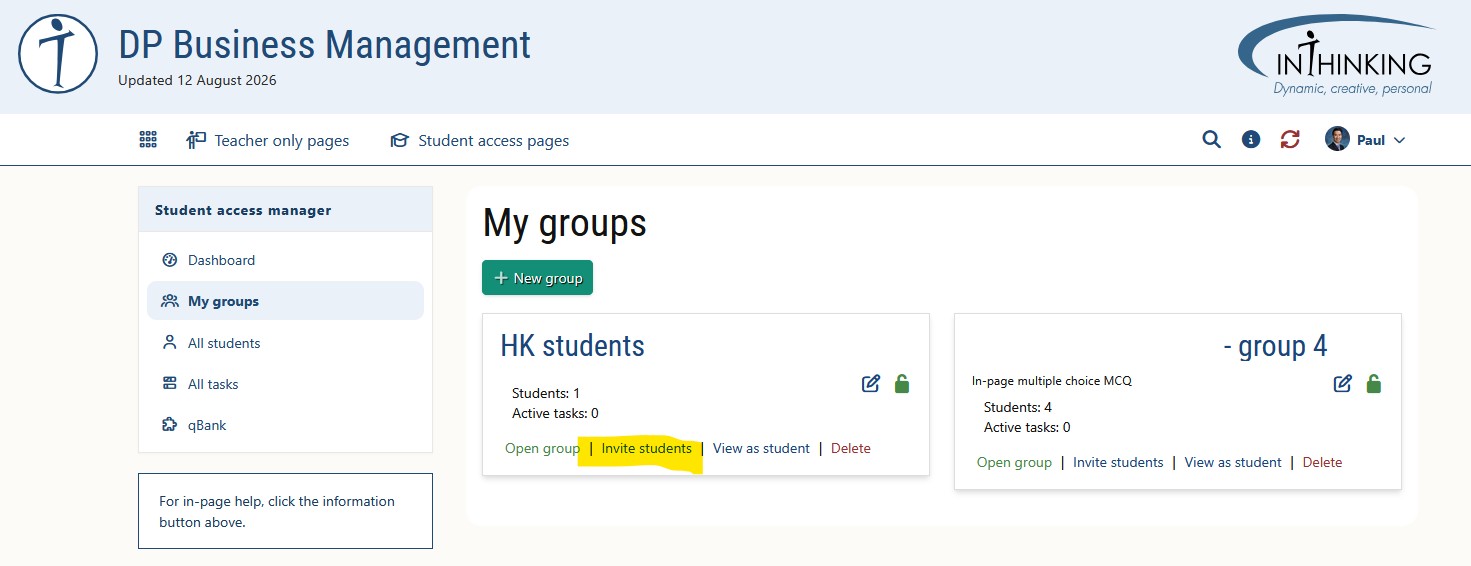
What if I have already created a group but have forgotten the link?
Go back to “My groups” and open the relevant group. You will see a list of the students who have joined your class.
Click “Invite students”. The invitation link will be displayed again for you to copy and share.
What if I want to add more content for my students?
You can update the resources available to a group at any time.
Open the relevant group and select the additional Business Management pages that you would like your students to access, then click “Save”.
This means you can gradually release resources as you progress through the course, rather than giving students access to everything at the beginning of the academic year.
Student access - Setting assignments
In Student Access, you can also assign work to your students. When they complete an assignment, the results are automatically recorded in the teacher's mark book.
There are two main types of assignments:
- Smart quizzes - These assignments ask students to answer multiple-choice or similar questions. Your mark book automatically ticks the assignment when they have done this and shows you their score.
- Written tasks - These assignments ask students to write text which you can then assess or simply give feedback.
The following two videos explain how to assign a page to students and set a task for assessment. Before you can do this, be sure to have set up your class groups.
We hope you enjoying using Student Access!
