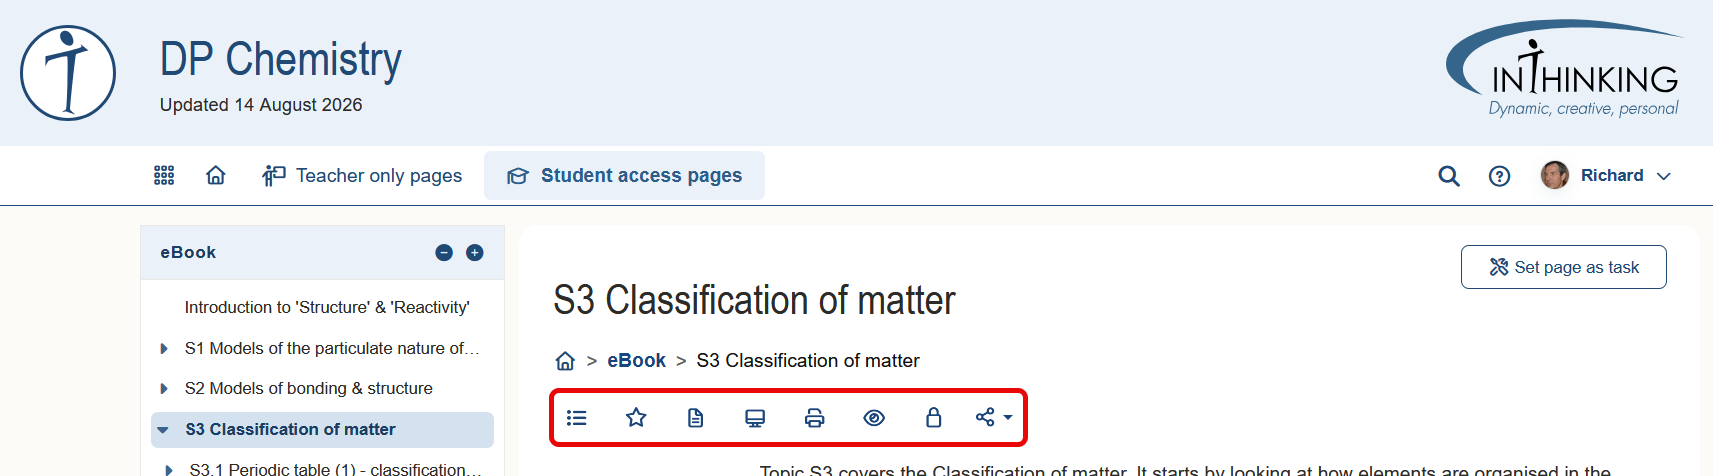
The following features can be accessed from any content page by clicking the relevant icon under the breadcrumbs at the top of the page:
- Table of contents
- Add to favourites
- Add notes
- Presentation mode
- View page as student
- Switch student page on/off
- Share
1 Table of contents
Long pages may contain a Table of contents which enables you to navigate quickly to the relevant section.
2. Add to favourites
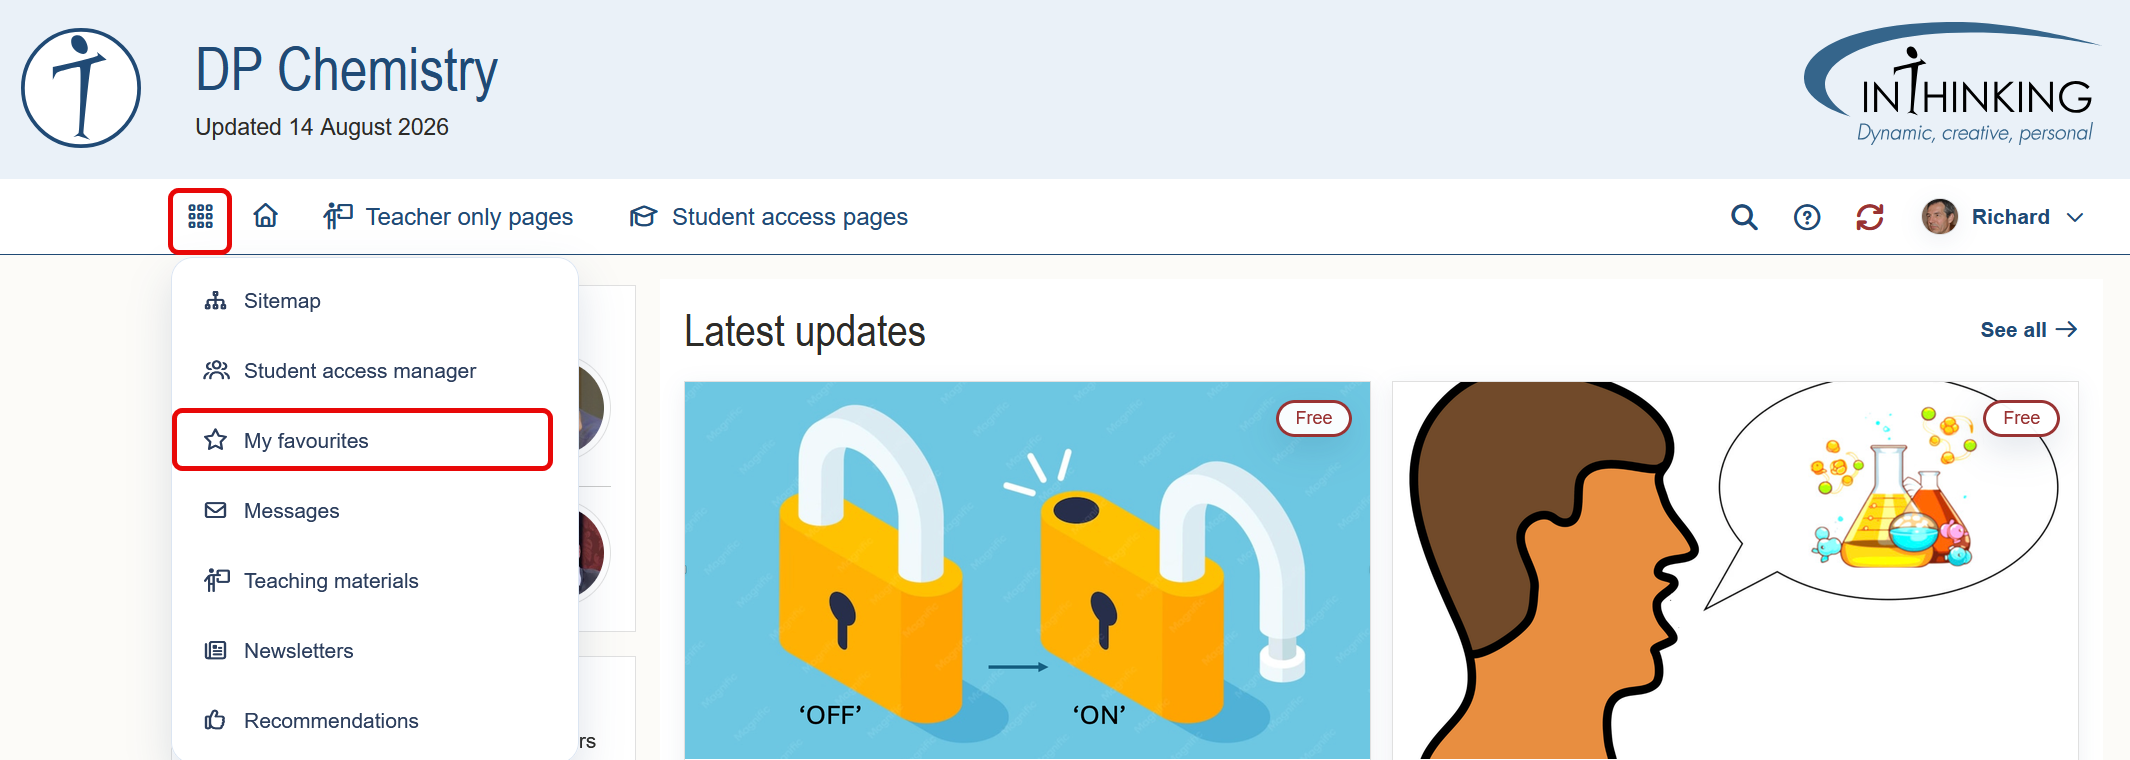
You can favourite a page so that you can easily find it again. Click on the star icon to favourite it and the icon fills blue. Click it again to unfavourite.
When you favourite a page, it is added to your list of My favourites which can be accessed from any page when you click on the waffle menu.
3. Add notes
When you click the “Add notes” icon, a space opens where you can add your own personal notes to a page. If you Save the notes, the icon will then show as solid blue. When you return to the page and click on the icon you will see your notes.
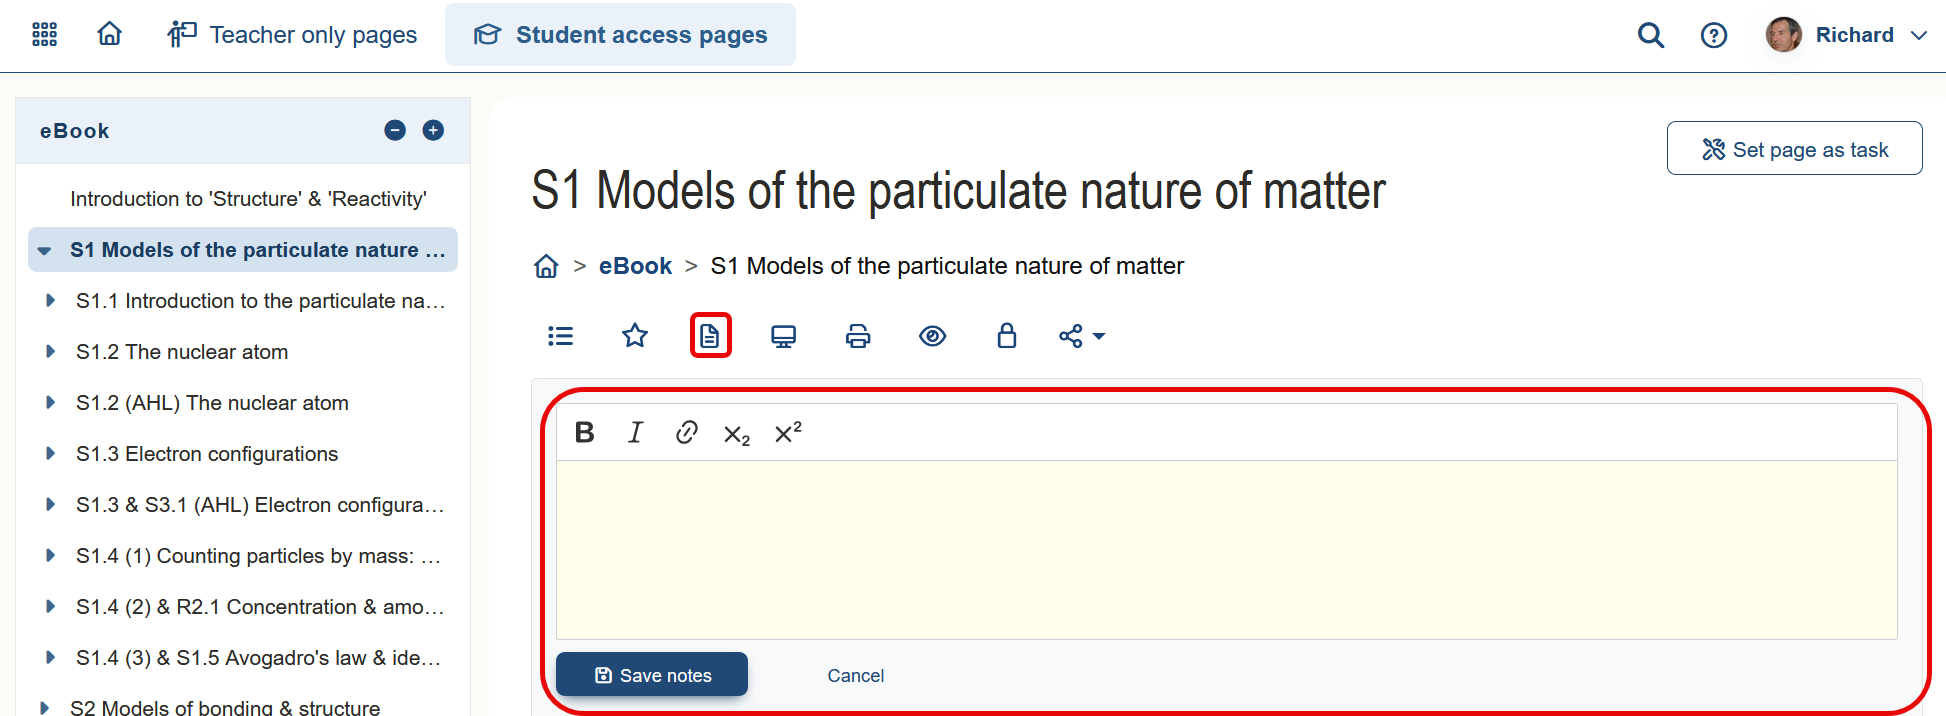
When you add a note to a page it is automatically added to “My favourites”, which can be accessed via the waffle menu (see above). In “My favourites”, you have the option of seeing all of the pages you have favourited, or only those which have notes.

In addition to adding global notes to the top of a page, you can also highlight any section of text and (optionally) annotate it. To do this, simply highlight the relevant text and a pen will appear:

When you click on the pen, the relevant text will be highlighted in you. You also have the option of changing the highlight colour and adding your own annotations.

When you leave the page, the text will remain highlighted. When you mouse over the highlighted text, you can see any notes you have added. You can delete the highlighted text (and notes) if it becomes unnecessary by clicking on it to bring up the in-line menu and then clicking “Delete all”.
Note that students, as well as teachers, can add notes to the top of a student accessible page, and can highlight and annotate text.
4. Presentation mode
Presentation mode strips content pages of extraneous features leaving only the material in the central column and hiding all Teacher only boxes. This is very useful if you wish to project a page in the classroom and work through it with students.
To exit presentation mode, click the ESC button on your keyboard.
5. Print
Click on the Print icon to print a page. As with presentation mode, the page will be stripped on extraneous features and only print the content in the central column.
6. View page as student
You can view a page as a student by clicking the eye icon. The key difference between viewing a page as a teacher and viewing it as a student is that the latter strips out any Teacher only boxes which, for obvious reasons, cannot be seen by students.

7. Switch student page on/off
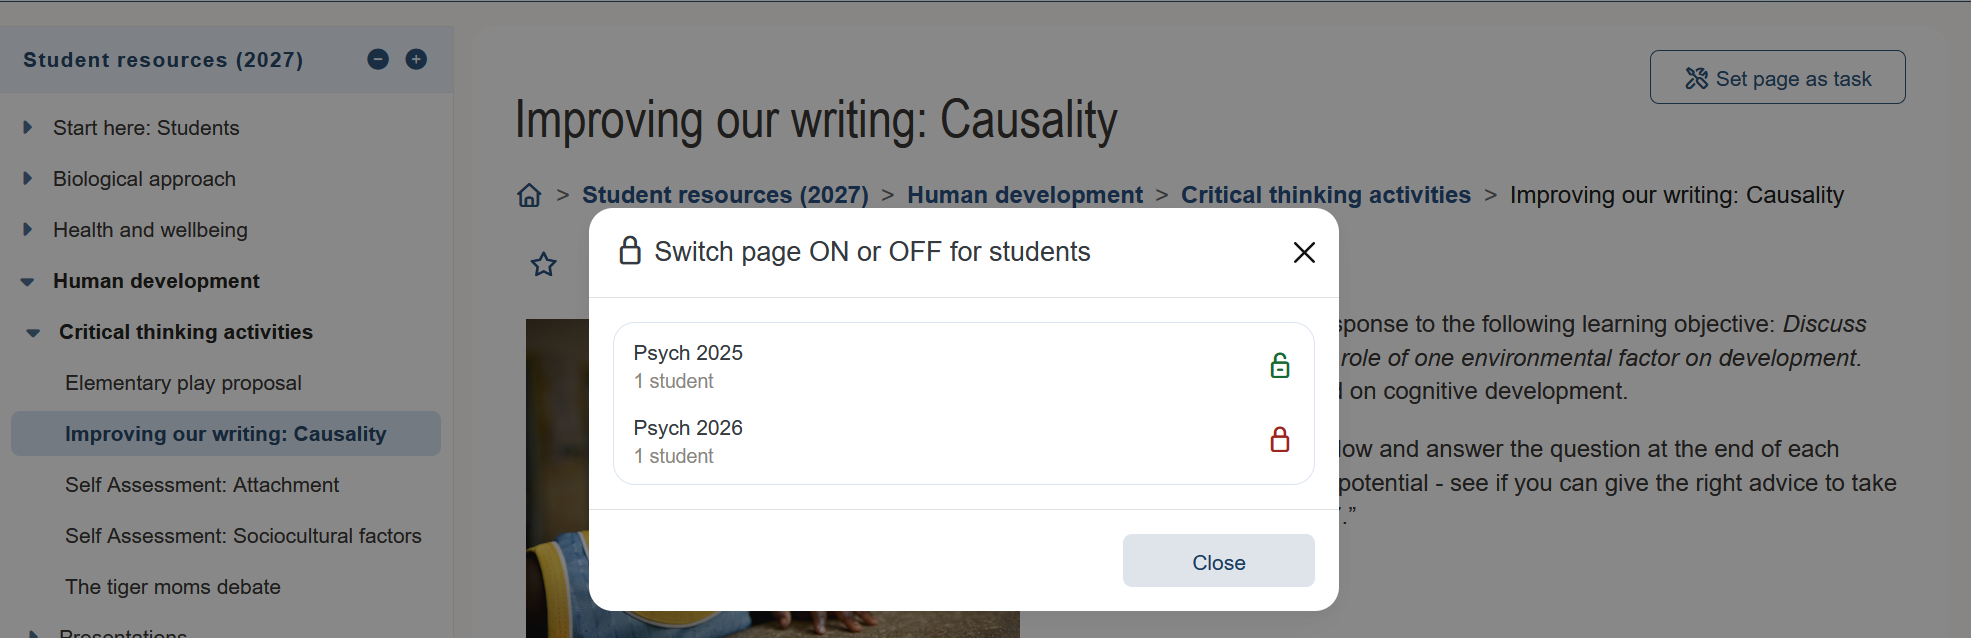
You can switch a student accessible page on or off for a group by clicking the padlock icon. This opens a modal listing your groups. A red padlock indicates that the page is OFF for that group; a green padlock indicates that it is ON. Click a red padlock and it will turn green; click again and it will revert to red.
8. Share
You can quickly and easily share a page on the following social media networks:
- X
- LinkedIn
In-page badges
Teacher only pages
Some pages on the site are for the exclusive use of teachers and are marked as such with a badge on the top right of the page.

These pages typically contain advise to teachers on such things as course structure, teaching strategies, and exam preparation. They are not suitable for students and cannot be accessed by them.
Set page as task
Student accessible pages typically contain a range of readings, activities, quizzes, and written tasks. Such pages are indicated by the Set page as task badge top right. This allows you to set the page as task for a group directly, without having to go via the Student access manager.

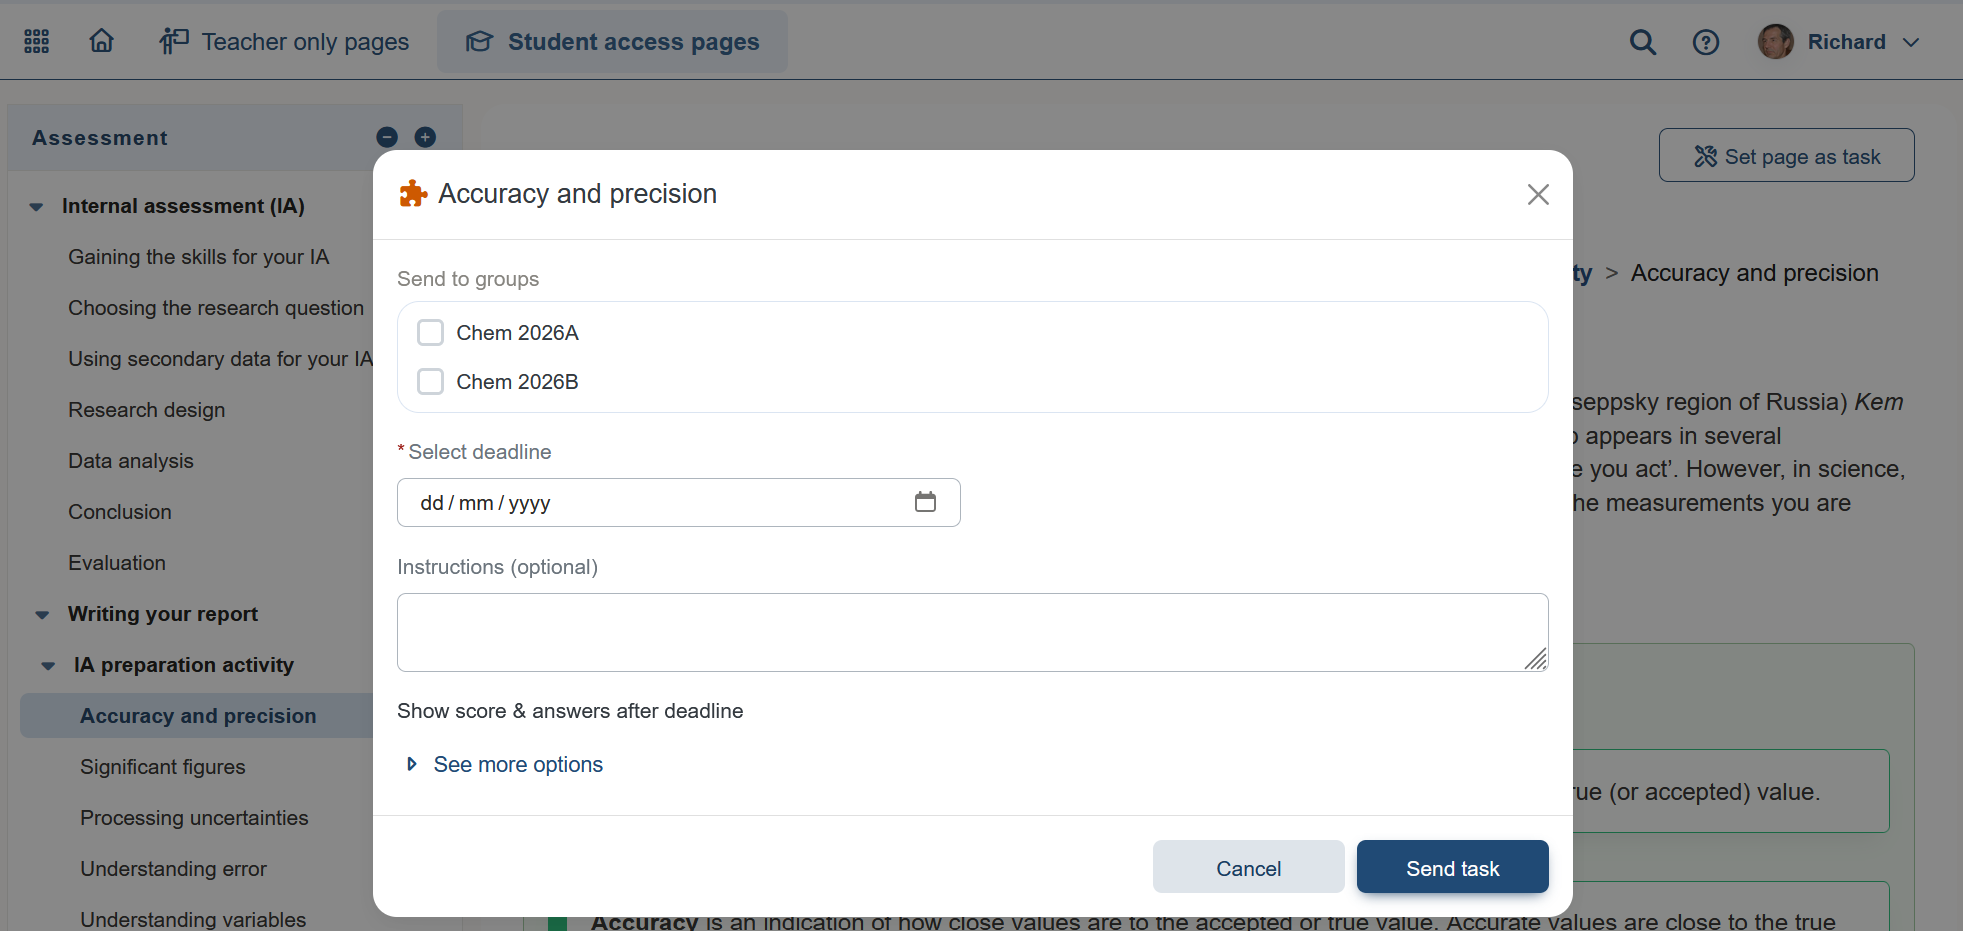
When you click “Set page as task”, a pop-up window opens which asks you to choose the group or groups who will receive the task, to set a deadline, and to add any optional instructions. (You also have several other options.) When done click “Send task”.
Reporting a problem and leaving a comment
Report a problem
We are constantly striving to make our sites more user friendly. You can help us to achieve this by reporting to InThinking Central any problems that you notice with functionality. “Report problem” can be found directly above the Comment section at the bottom of each page, and it enables you to email us directly.

Leave a comment
You can also leave a comment for the site author about the content of the page and see comments contributed by other subscribers. (Note that you can also see recent subscriber comments at the bottom of the home page.)