Setting up student access
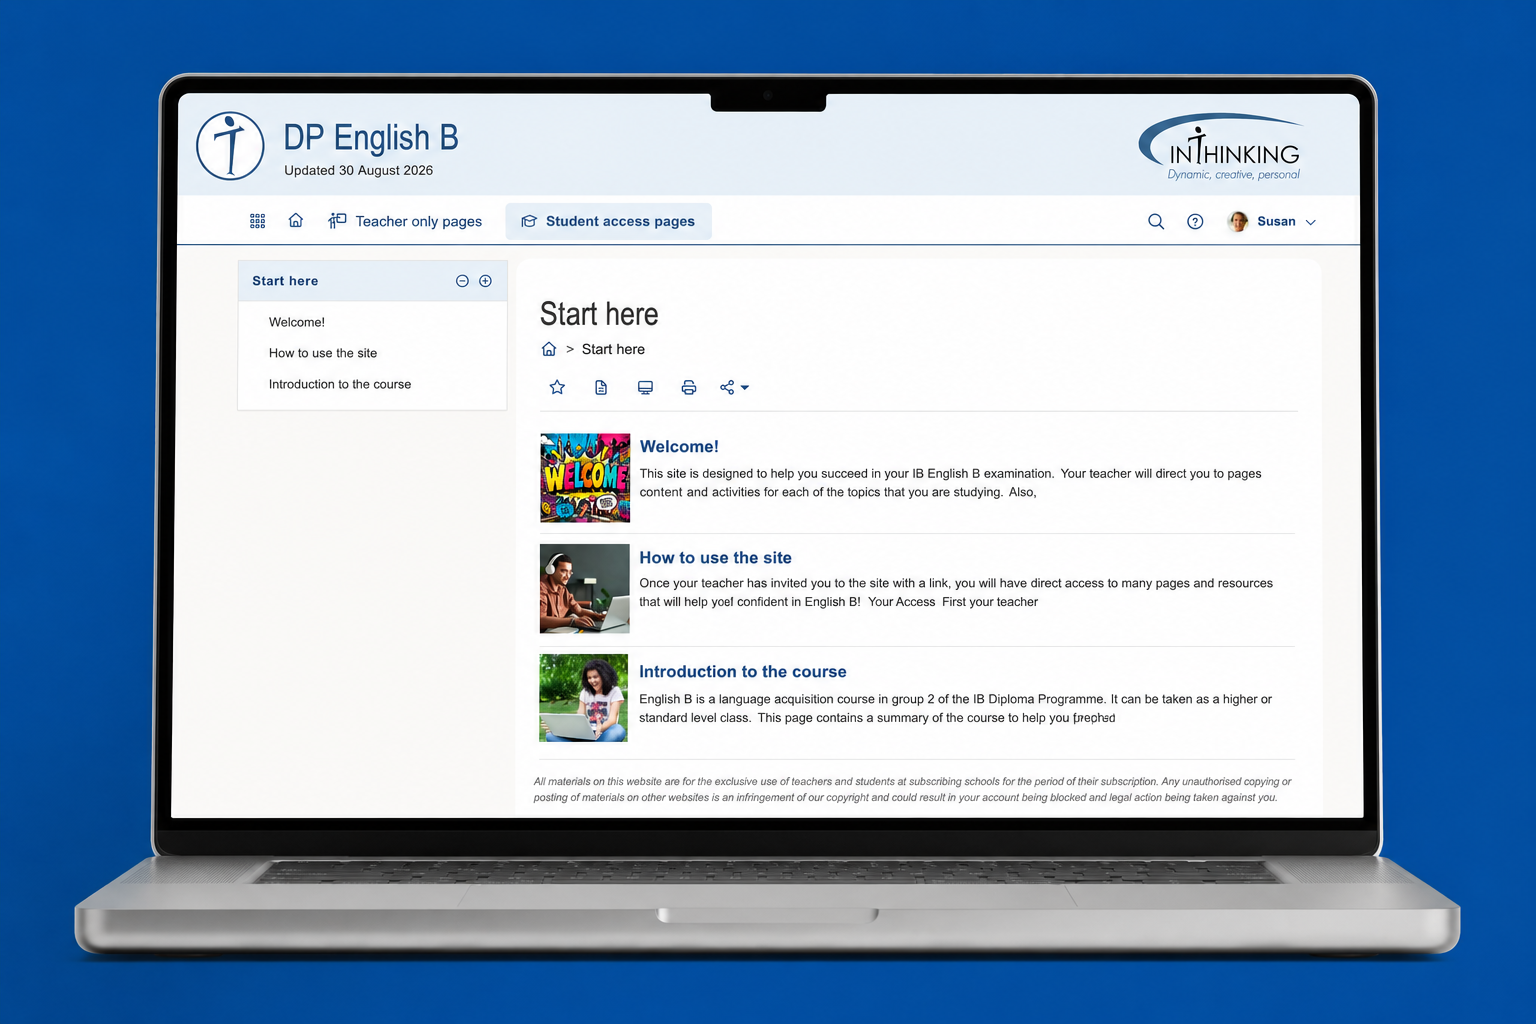
Getting started
Below is a step-by-step guide for how to set up student groups to begin assigning tasks and giving access to the site.
In order to use Student Access, the first essential step is to get your students invited into the system. Basically, they register themselves through a link that you send them.
They then appear in the list of the group to which you have allocated them, and so you can…
- Set assignments
- Mark the assignments (and the marks are recorded in your Student Access markbook
- Provide comments on their work
- … and more!
This helpful video will guide you through the process or you can check out the step-by-step process below:
So, how do we invite the students?
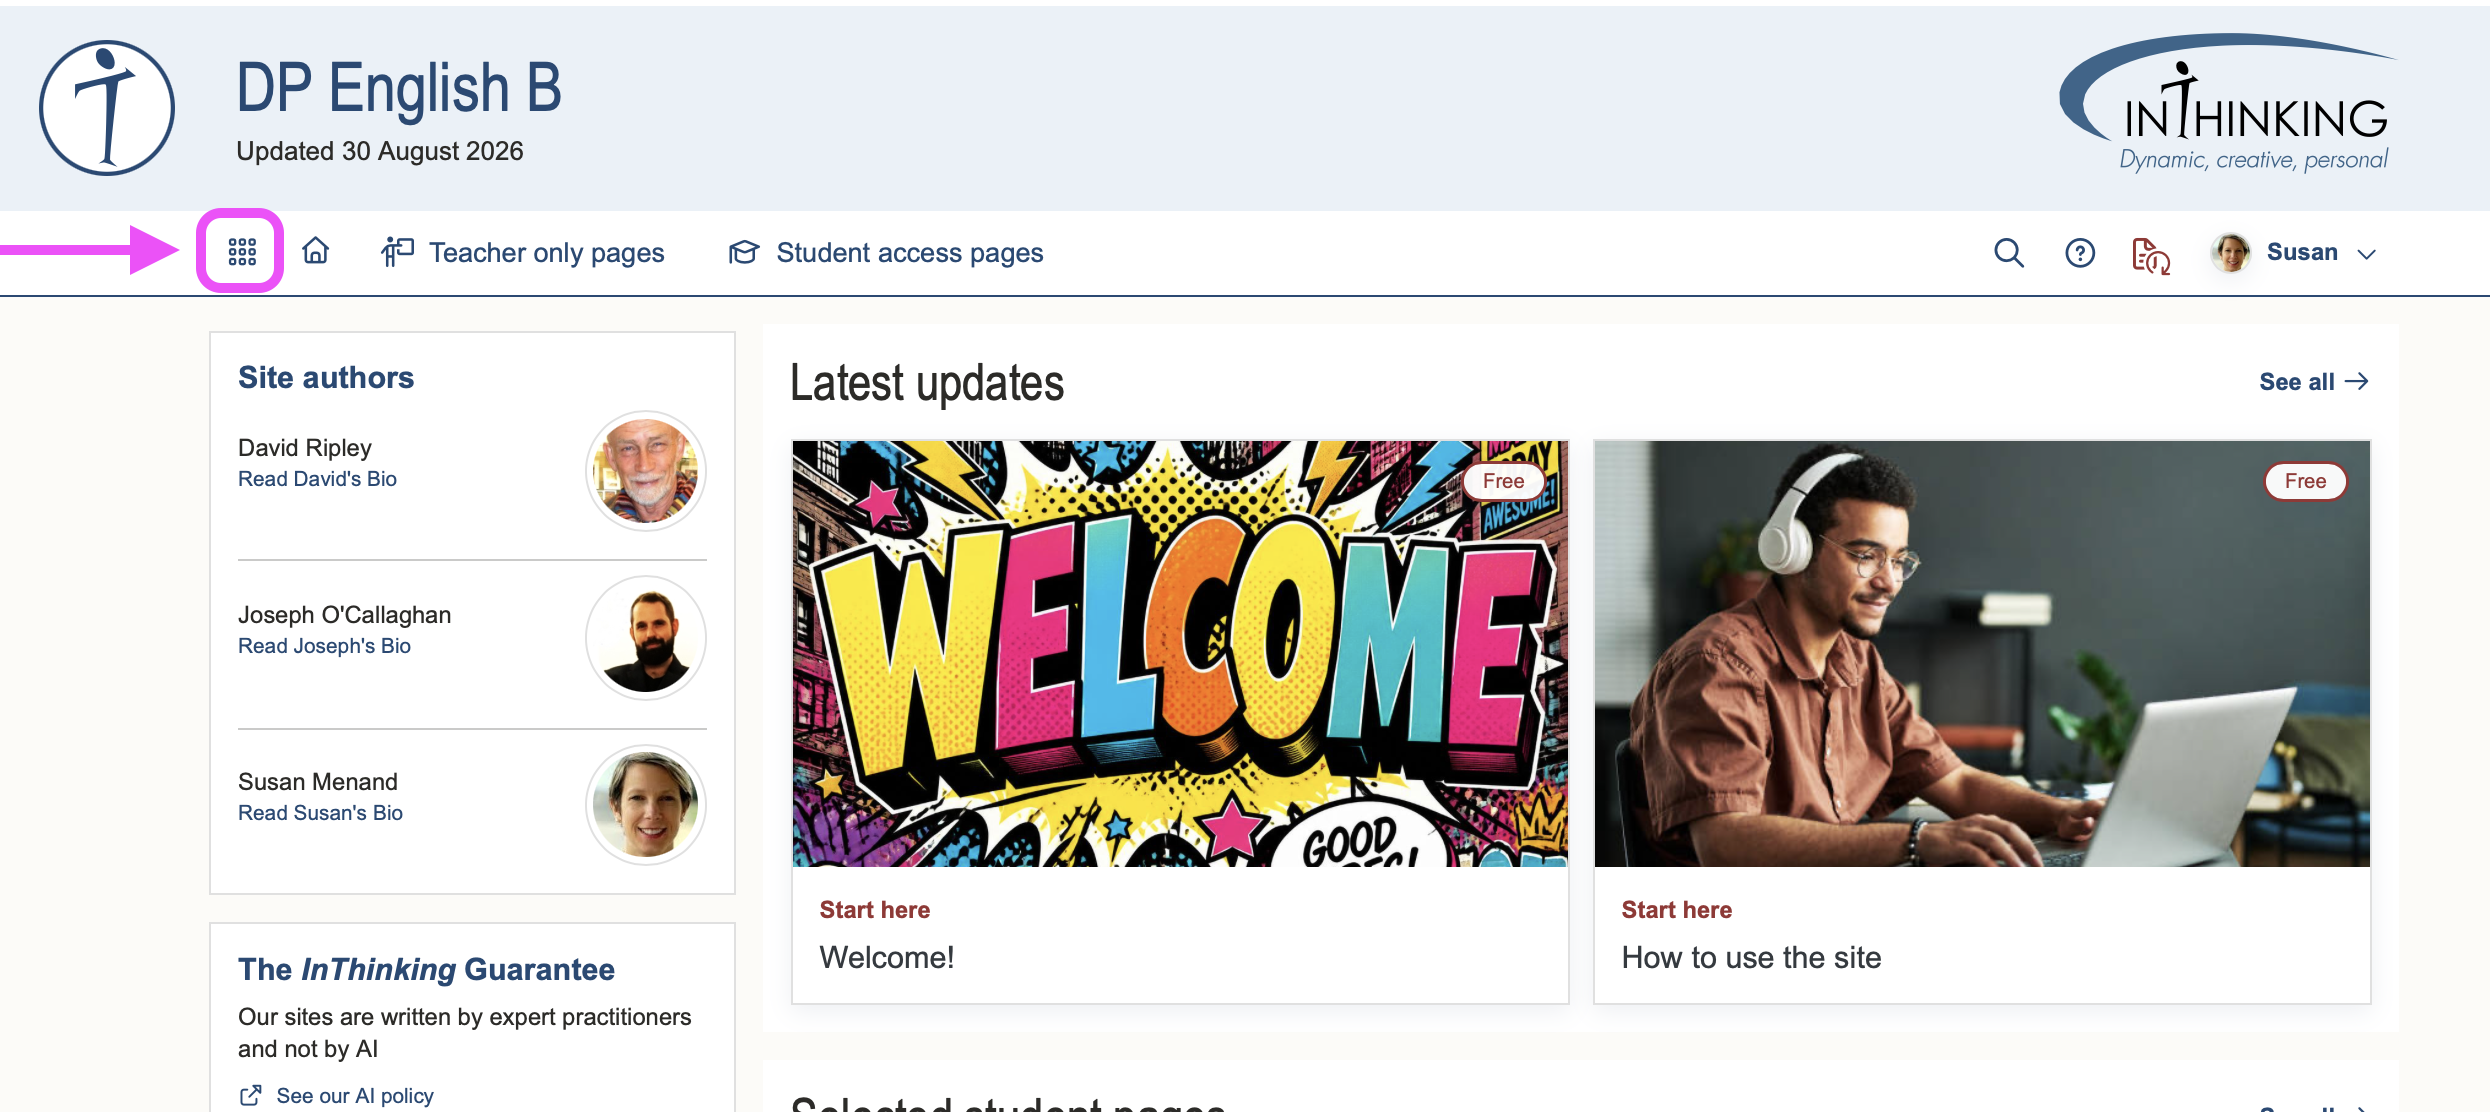
1. On the Home page, click on ‘Waffle Icon’ (top left)
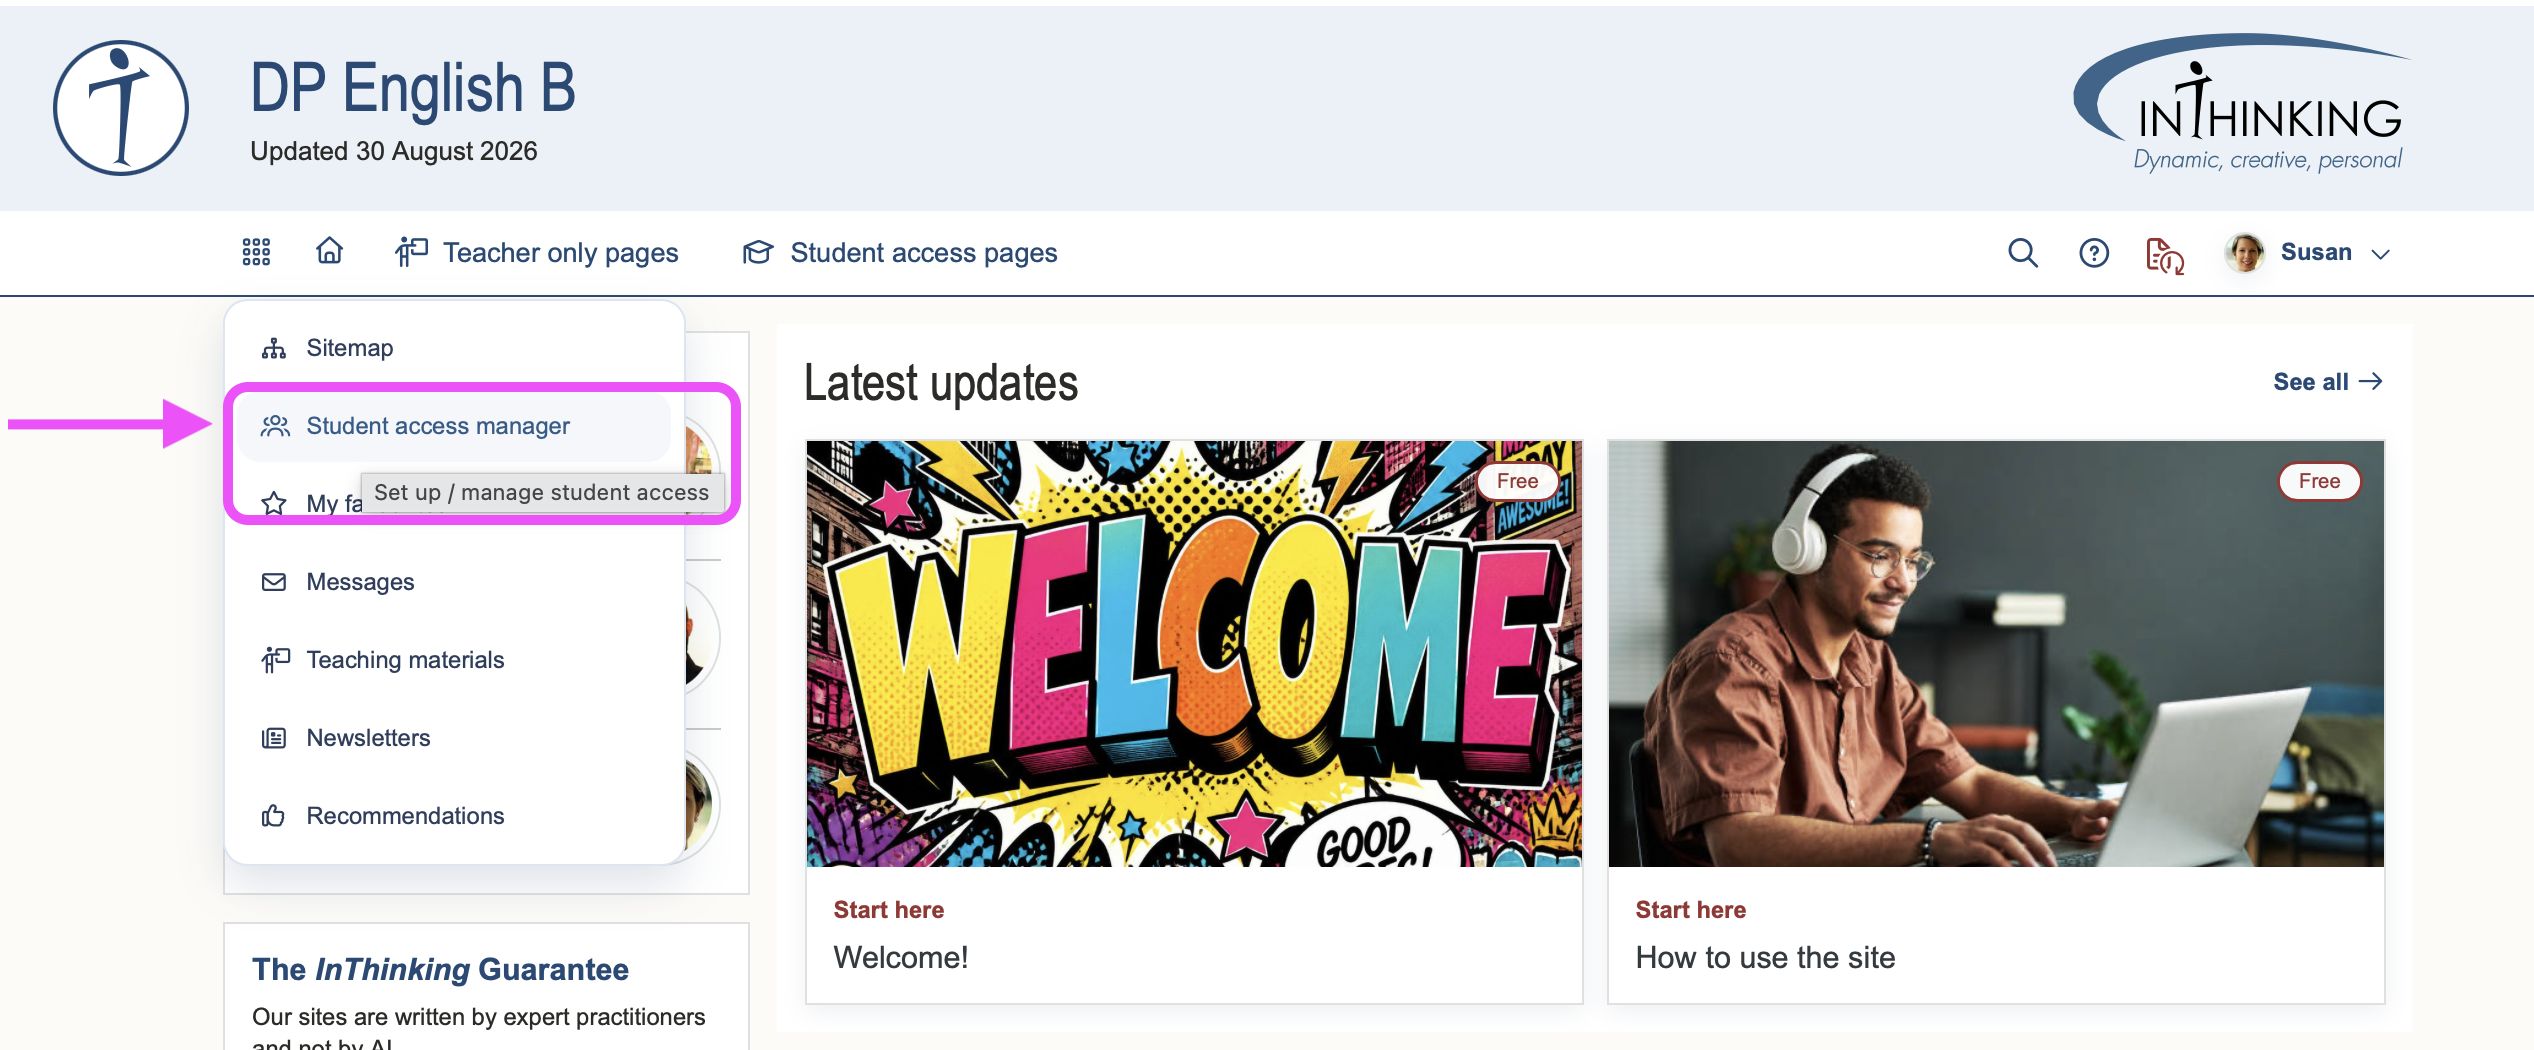
2. Click on ‘Student Access Manager’…
3. Now click on New Group…
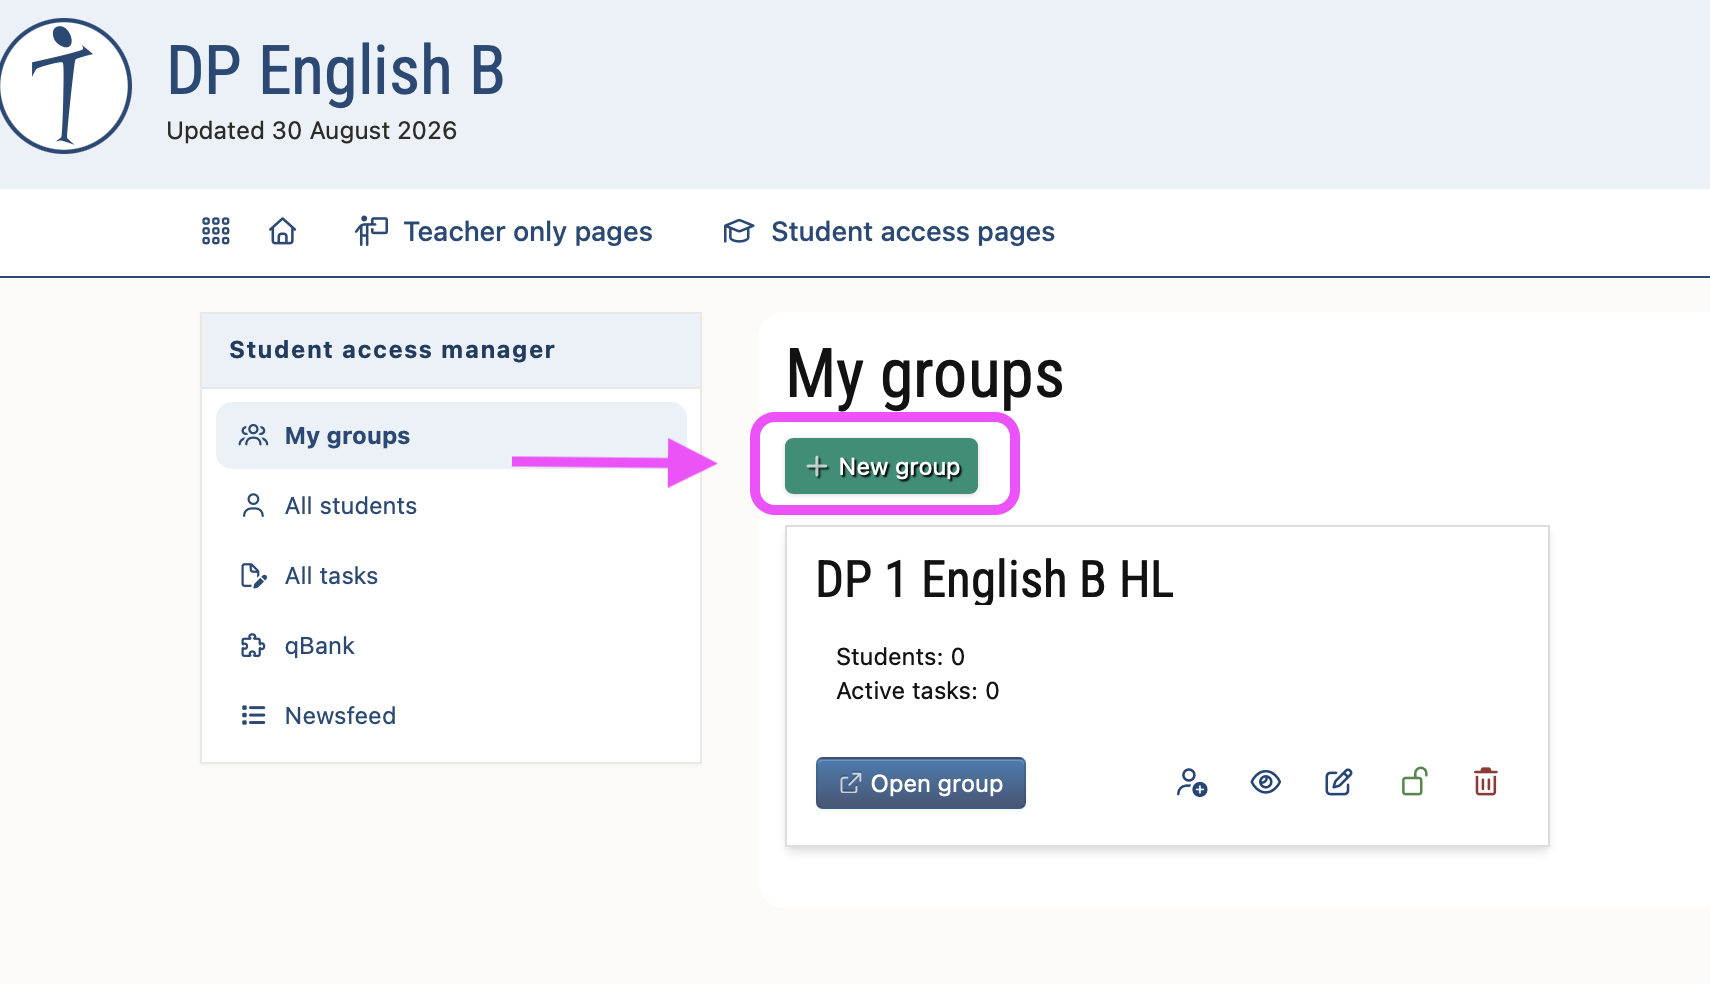
4. Now, you can create the name for your group or class…
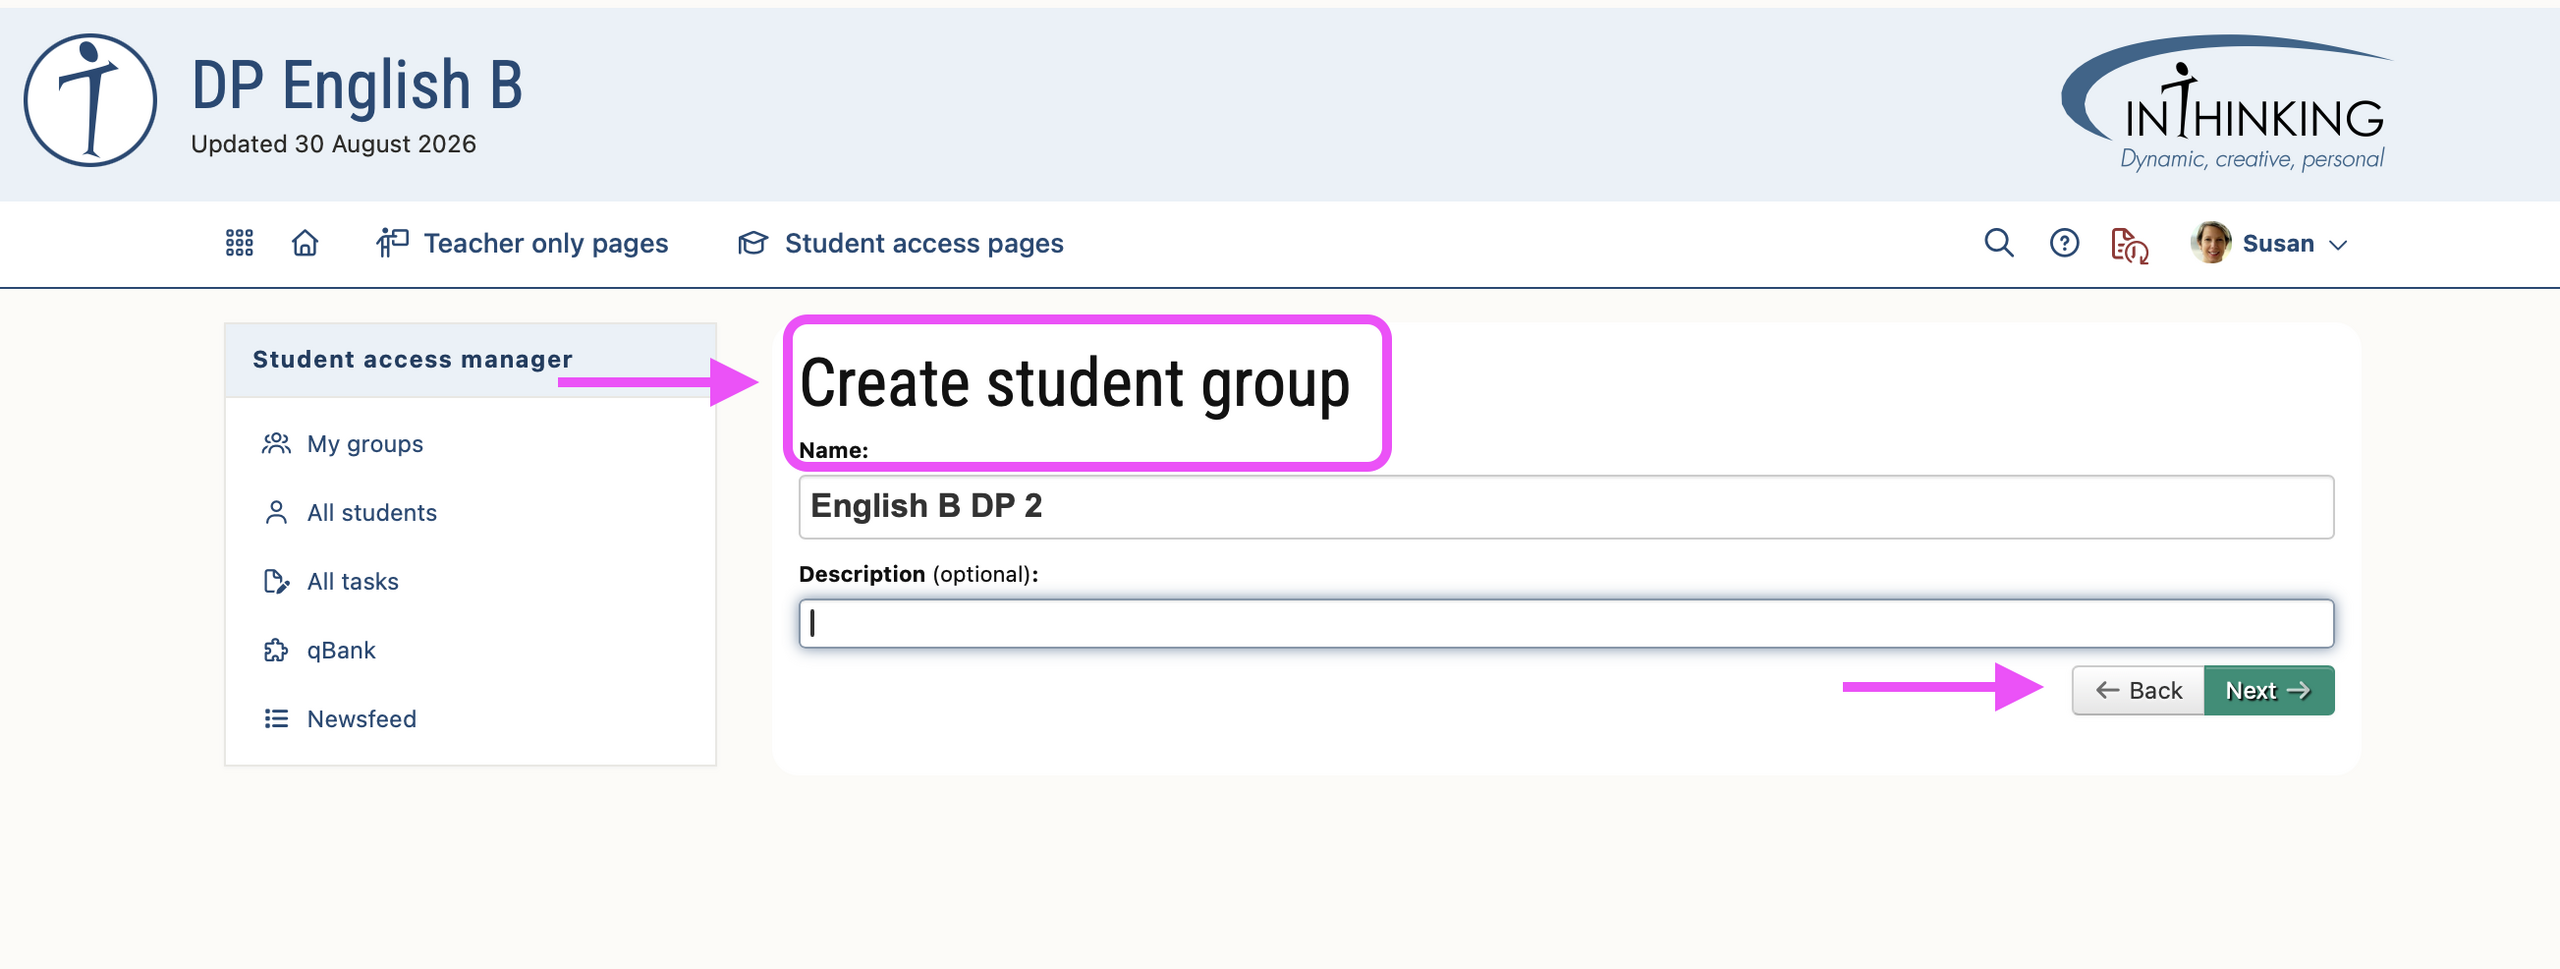
5. Once your new group has been created, you need to get your students registered in the system. To do so, click on ‘Invite students’, which will show you something like this…
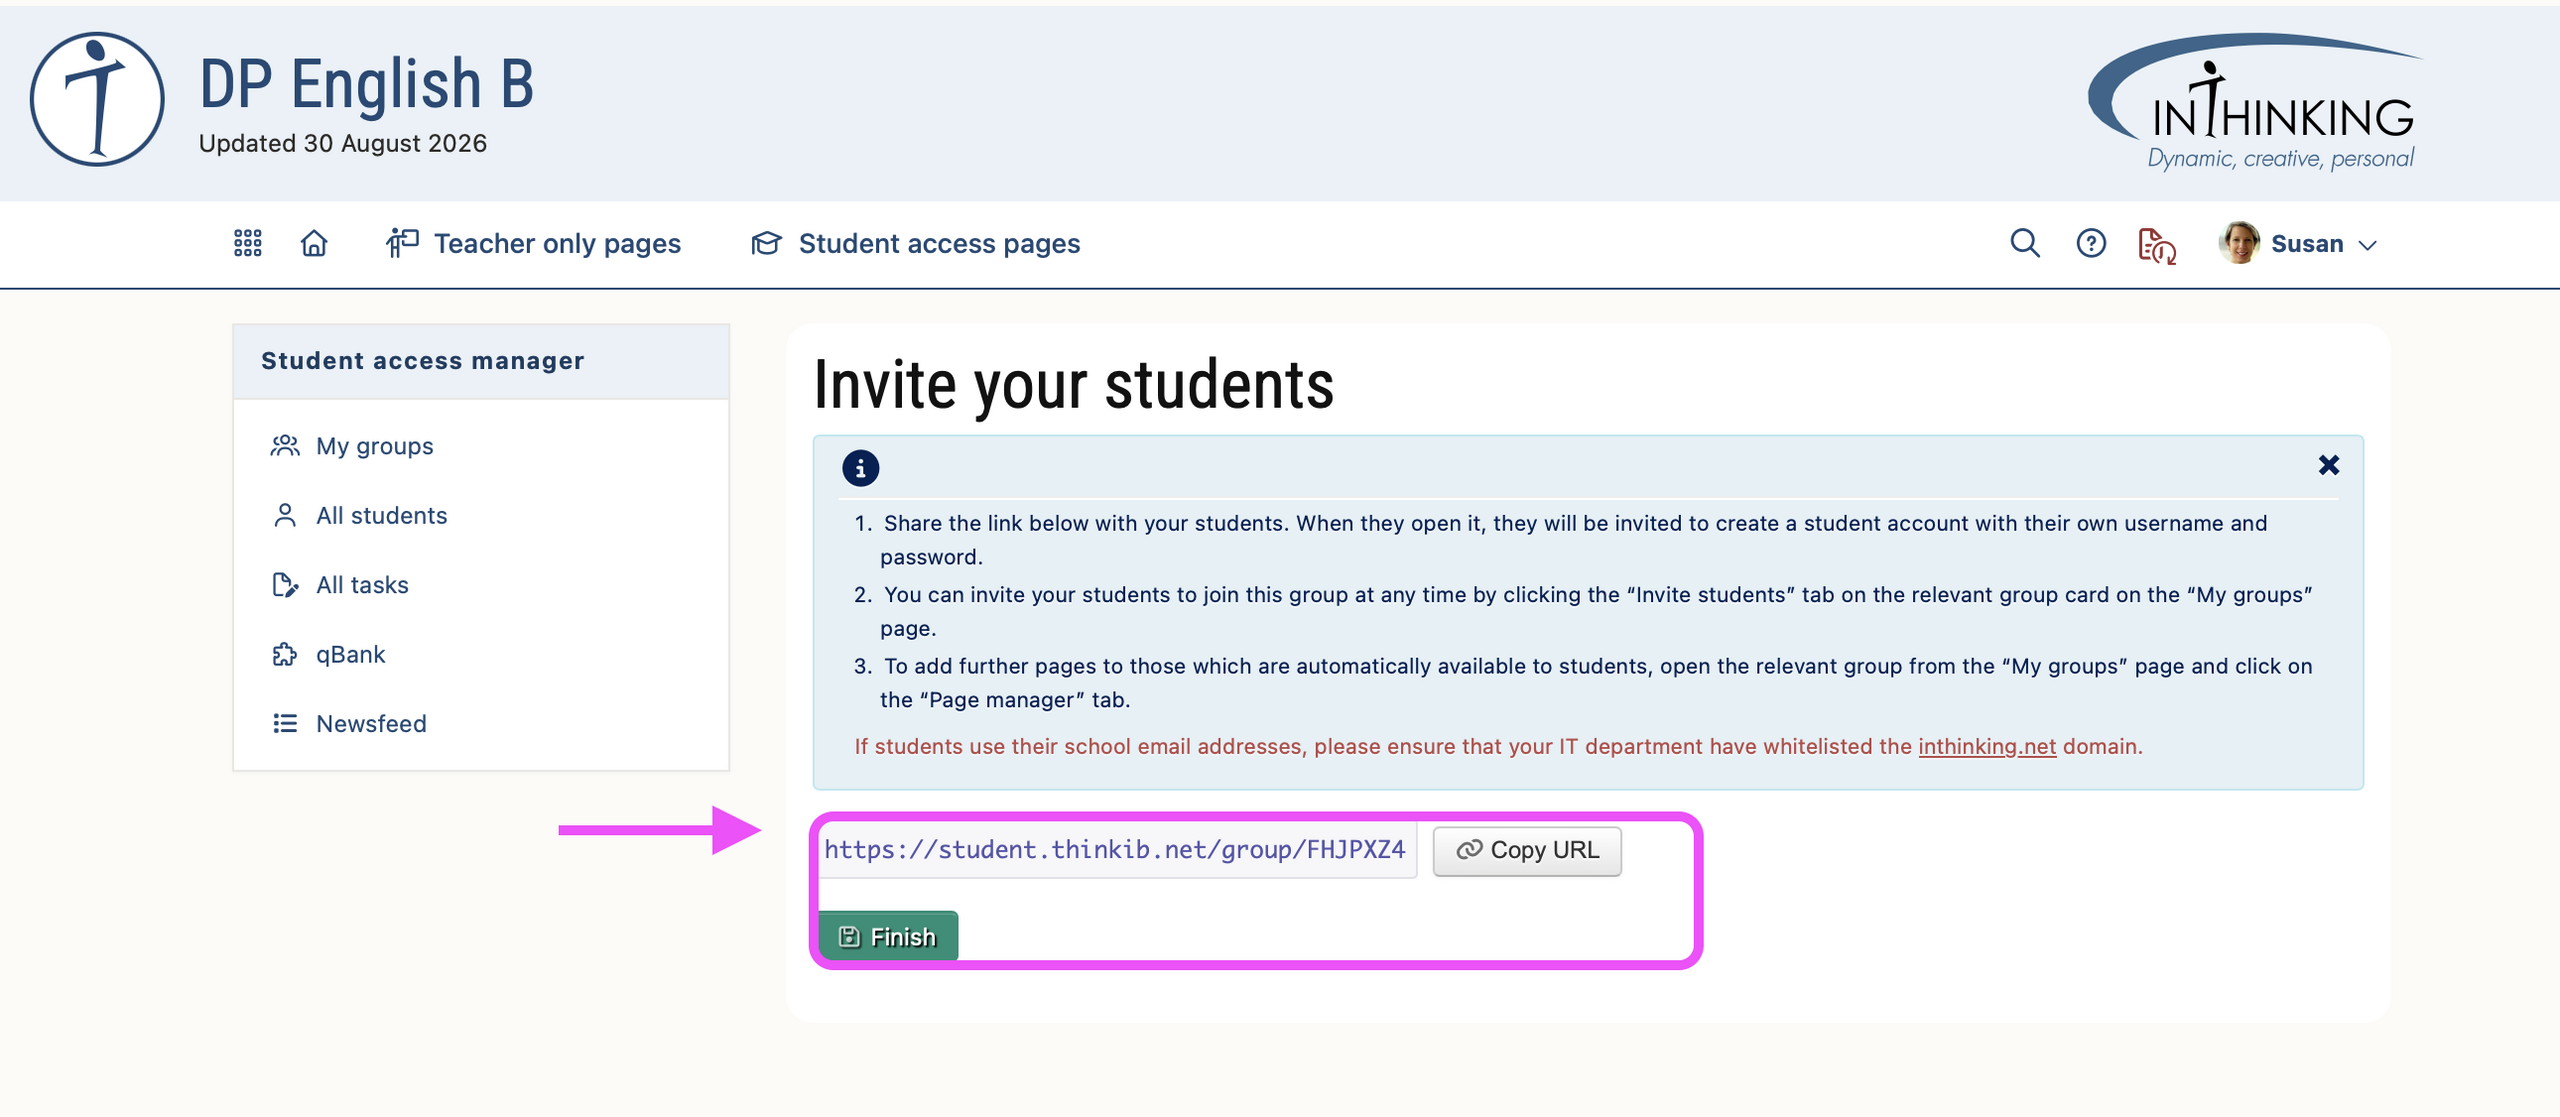
6. Give that URL to the students. Then wait, for the students to carry out the registration process themselves. Once they have submitted the details, their names will appear in the list for that group.
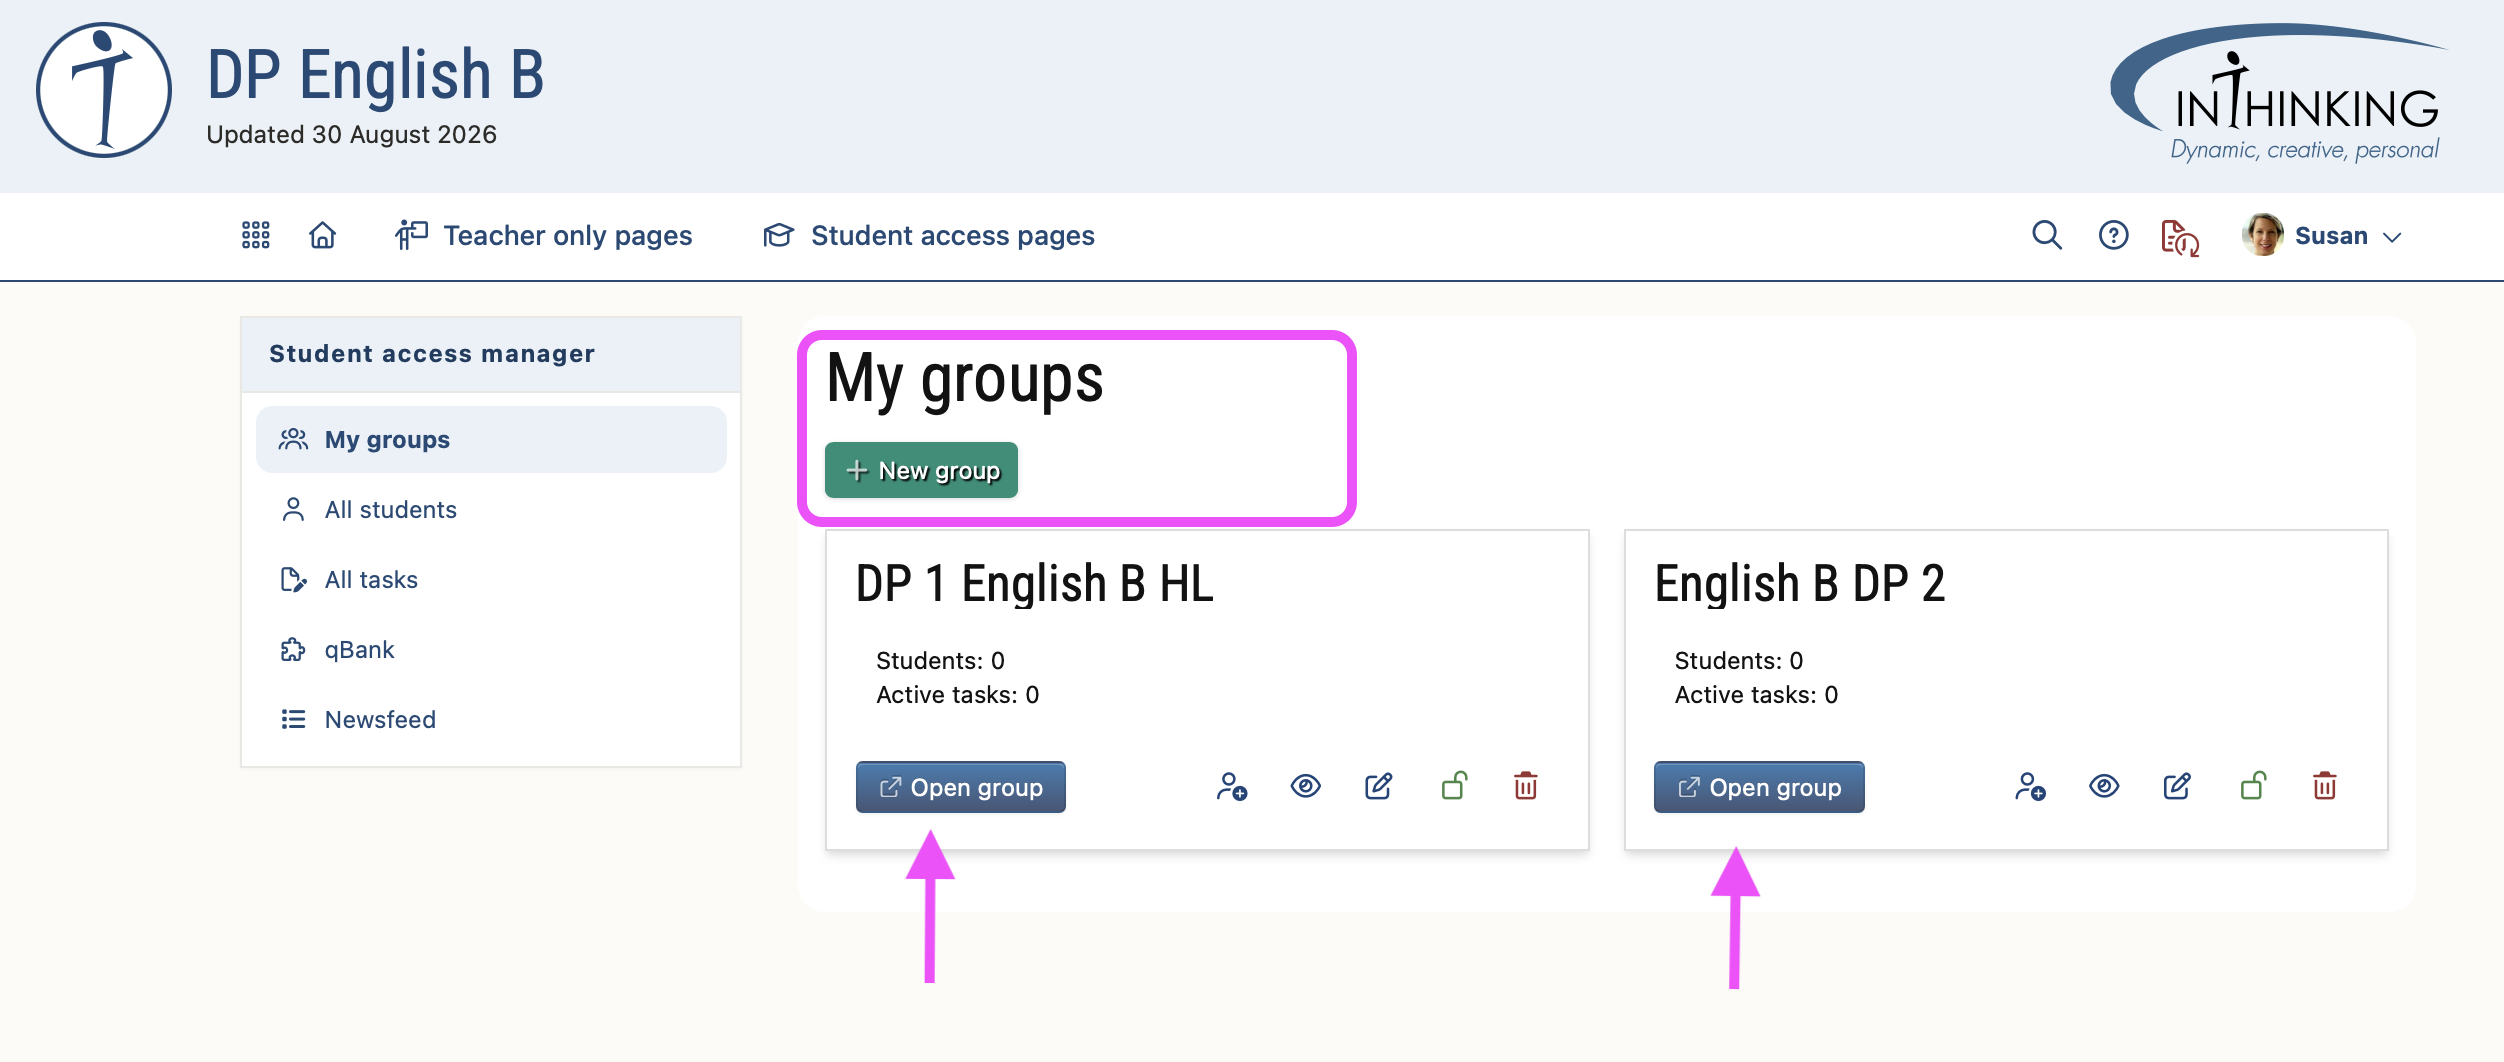
And once you've got them all registered and on board, you can start setting them assignments!
All materials on this website are for the exclusive use of teachers and students at subscribing schools for the period of their subscription. Any unauthorised copying or posting of materials on other websites is an infringement of our copyright and could result in your account being blocked and legal action being taken against you.