The "Add tasks" button
From the left hand menu of the Student access dashboard, you can set a task via "My groups", or "All tasks", or "All students". (You can also set a page as a task directly from the page itself using the Student access tools bar.)
Setting a task via My groups
To set a task or tasks via "My groups", go to "My Groups", open the [Group name], then click "Task manager", then click the green "Add tasks" button
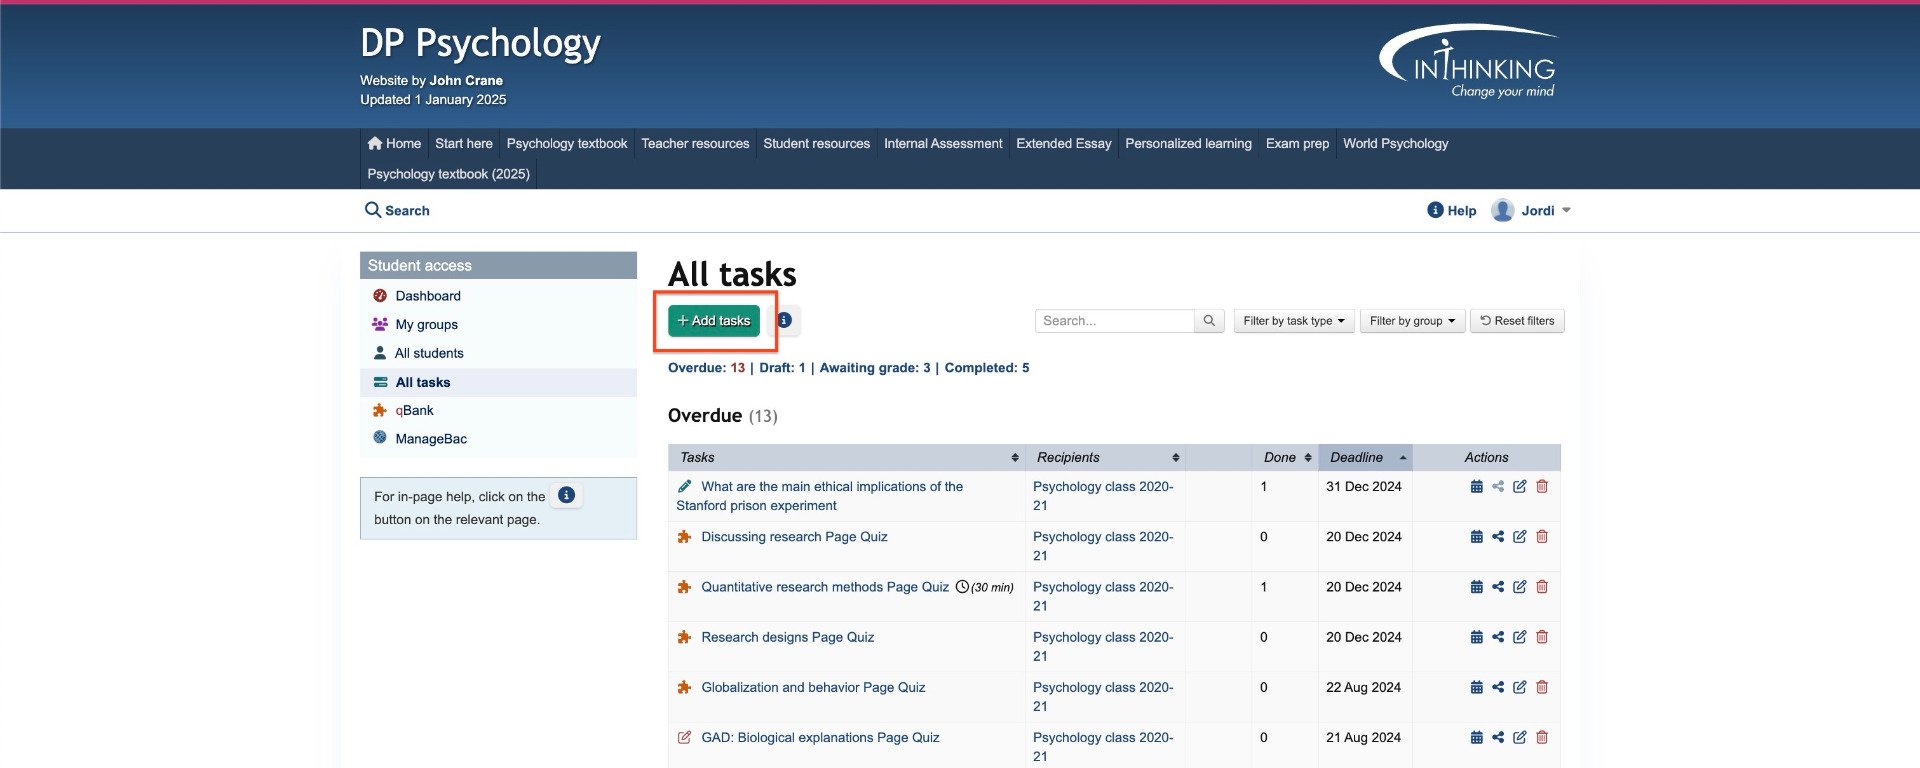
Setting a task via All Tasks
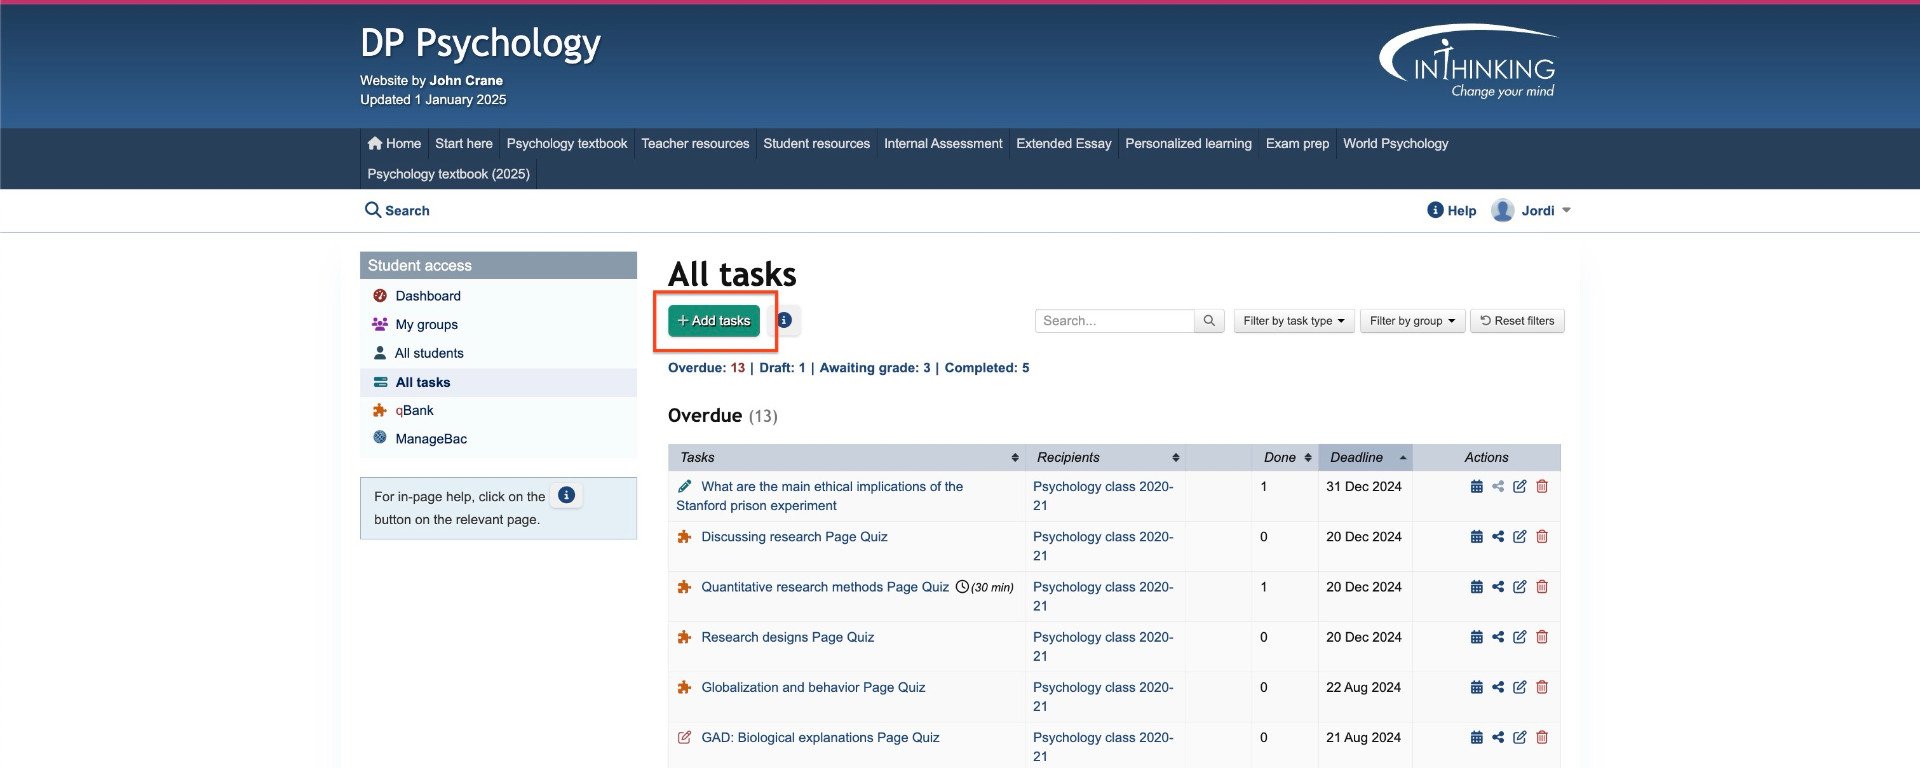
You can also add a task or tasks if you click on "All tasks" in the left hand menu and then click the green "Add tasks" button.
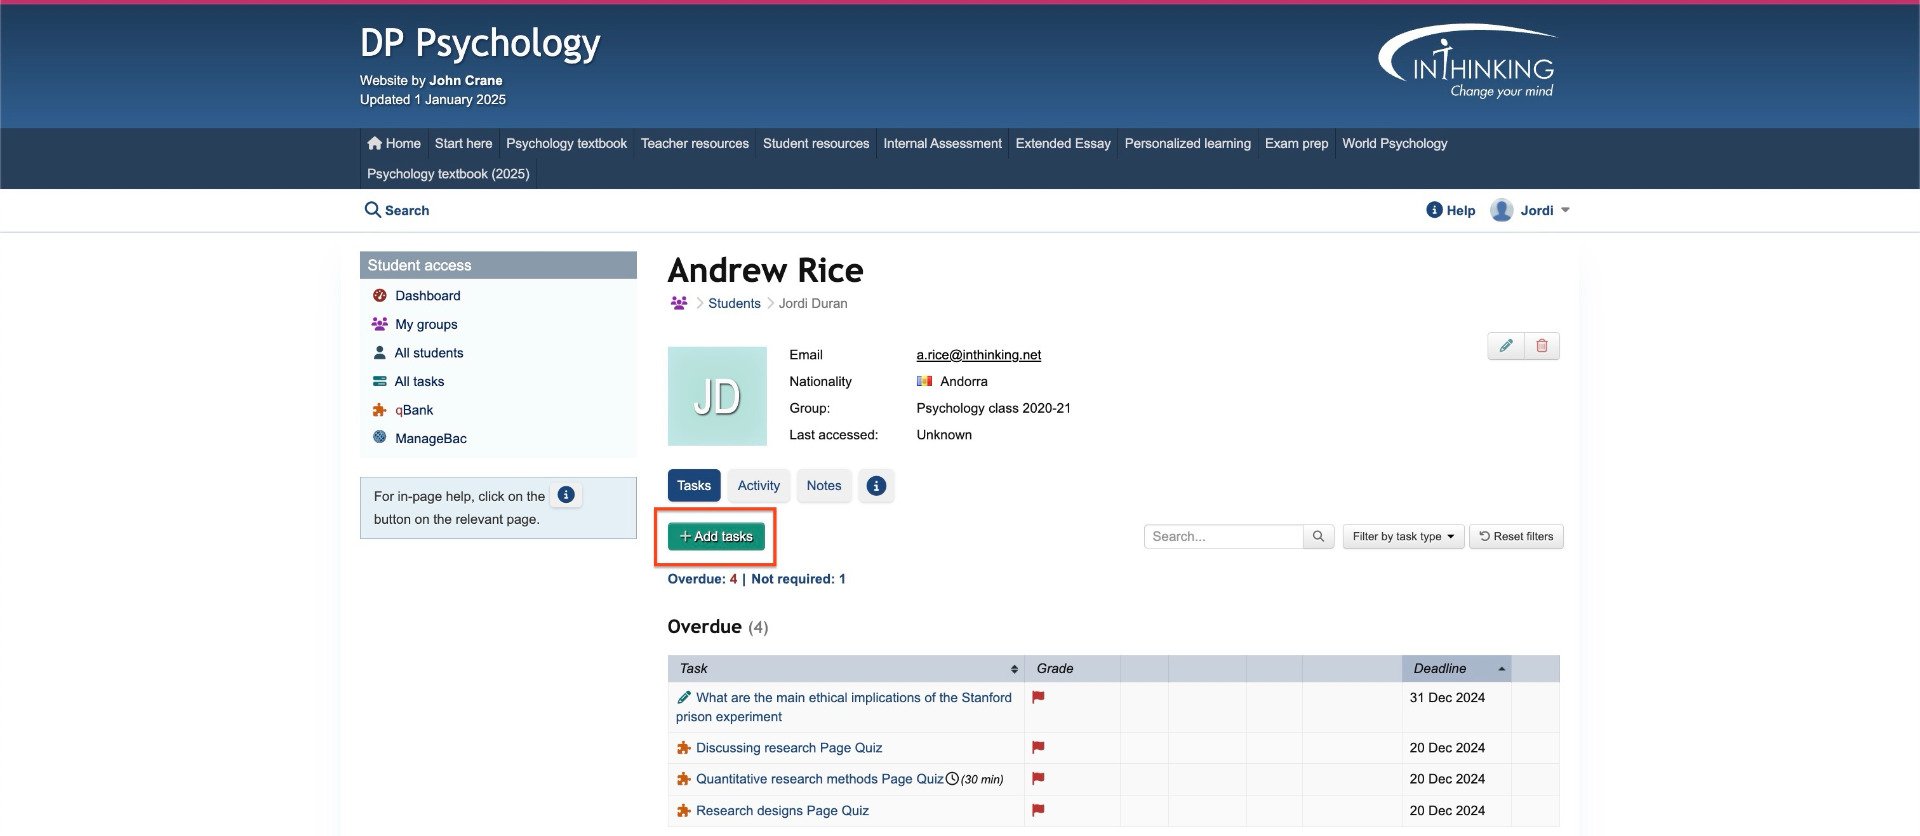
Setting a task via All Students
A final way to set a task from the Student access dashboard is to click on "All students" in the left hand menu, then click on a student's name, then click the green "Add tasks" button
Creating a task
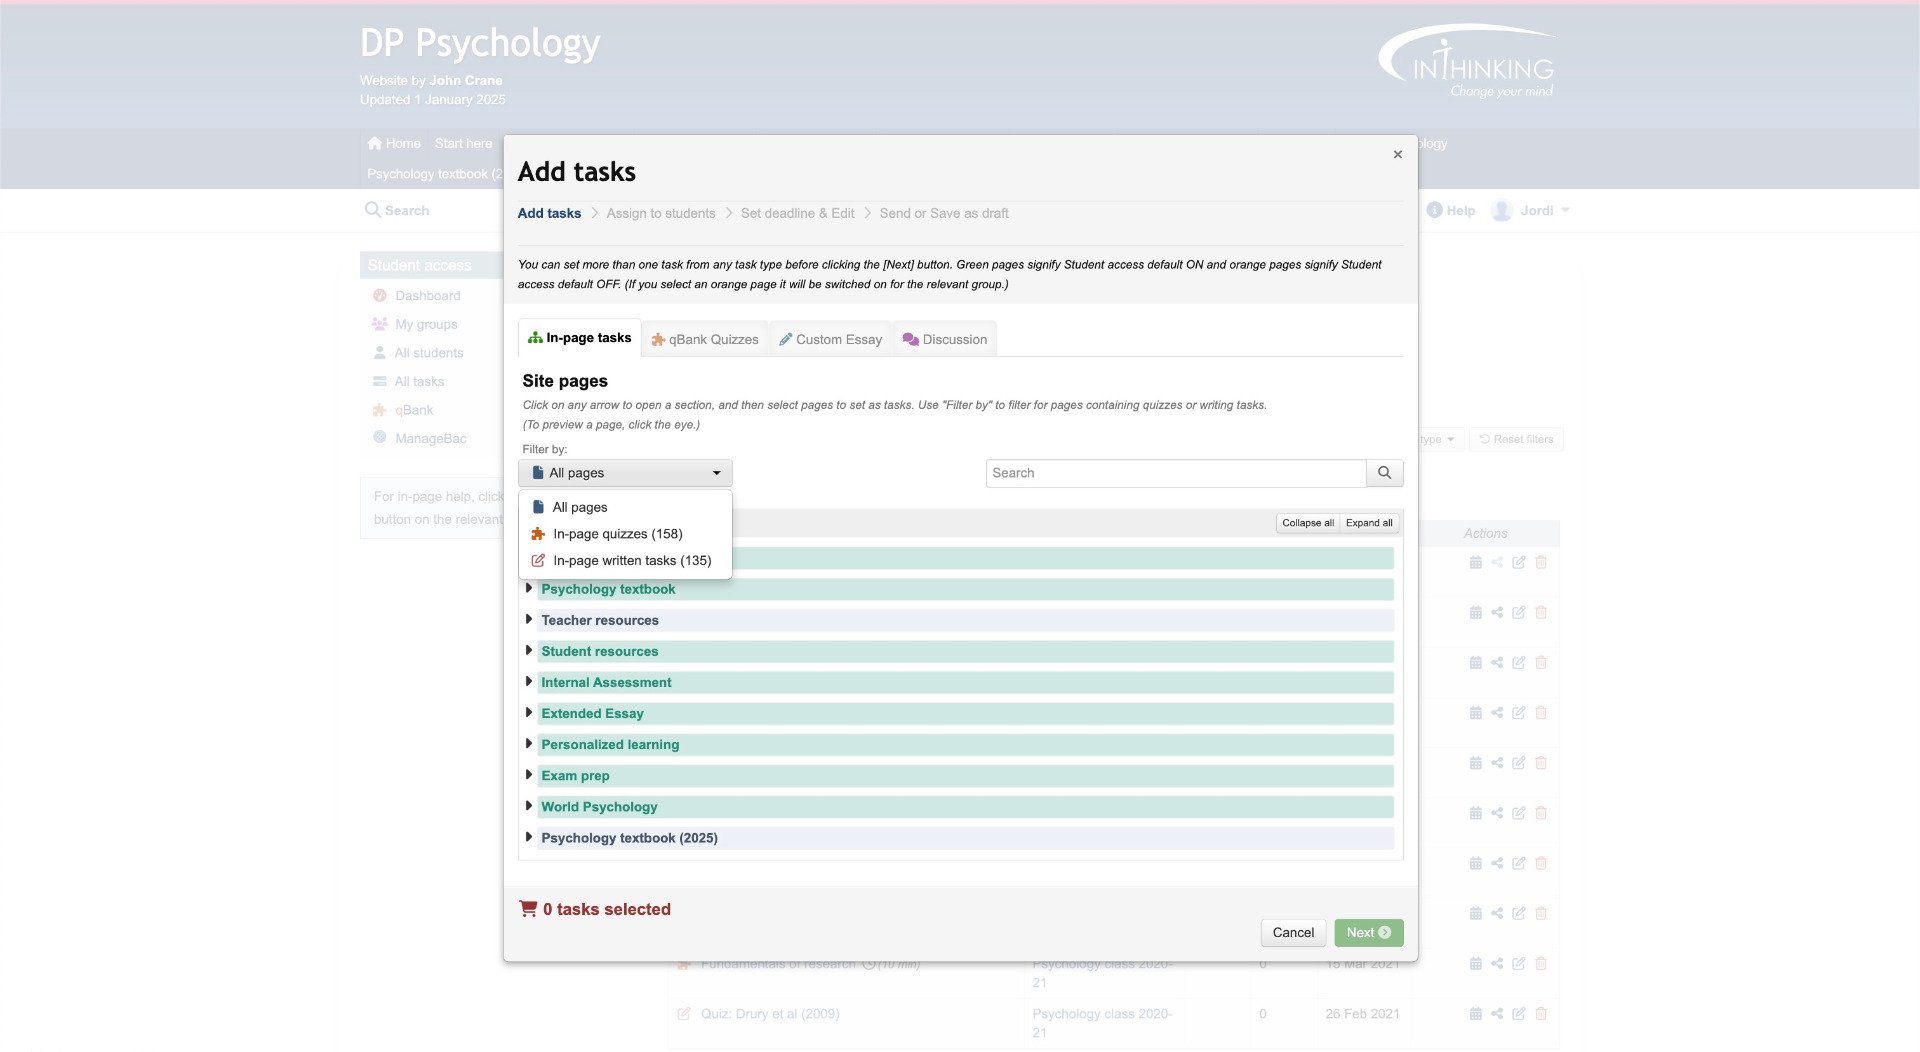
Clicking the "Add tasks" button from any of the above views takes you to the "Add tasks" pop-up. You are then taken through a simple process to send a task or tasks to students.
1. Select tasks
You can select one or more In-page tasks, qBank quizzes, Custom essays or Discussion tasks. (For more on different types of tasks, go to the Task types section of this Help.)
Use the in-page task filters to find pages which include quizzes or written tasks.
2. Assign to students
You can assign the task to one or more groups or to individual students:
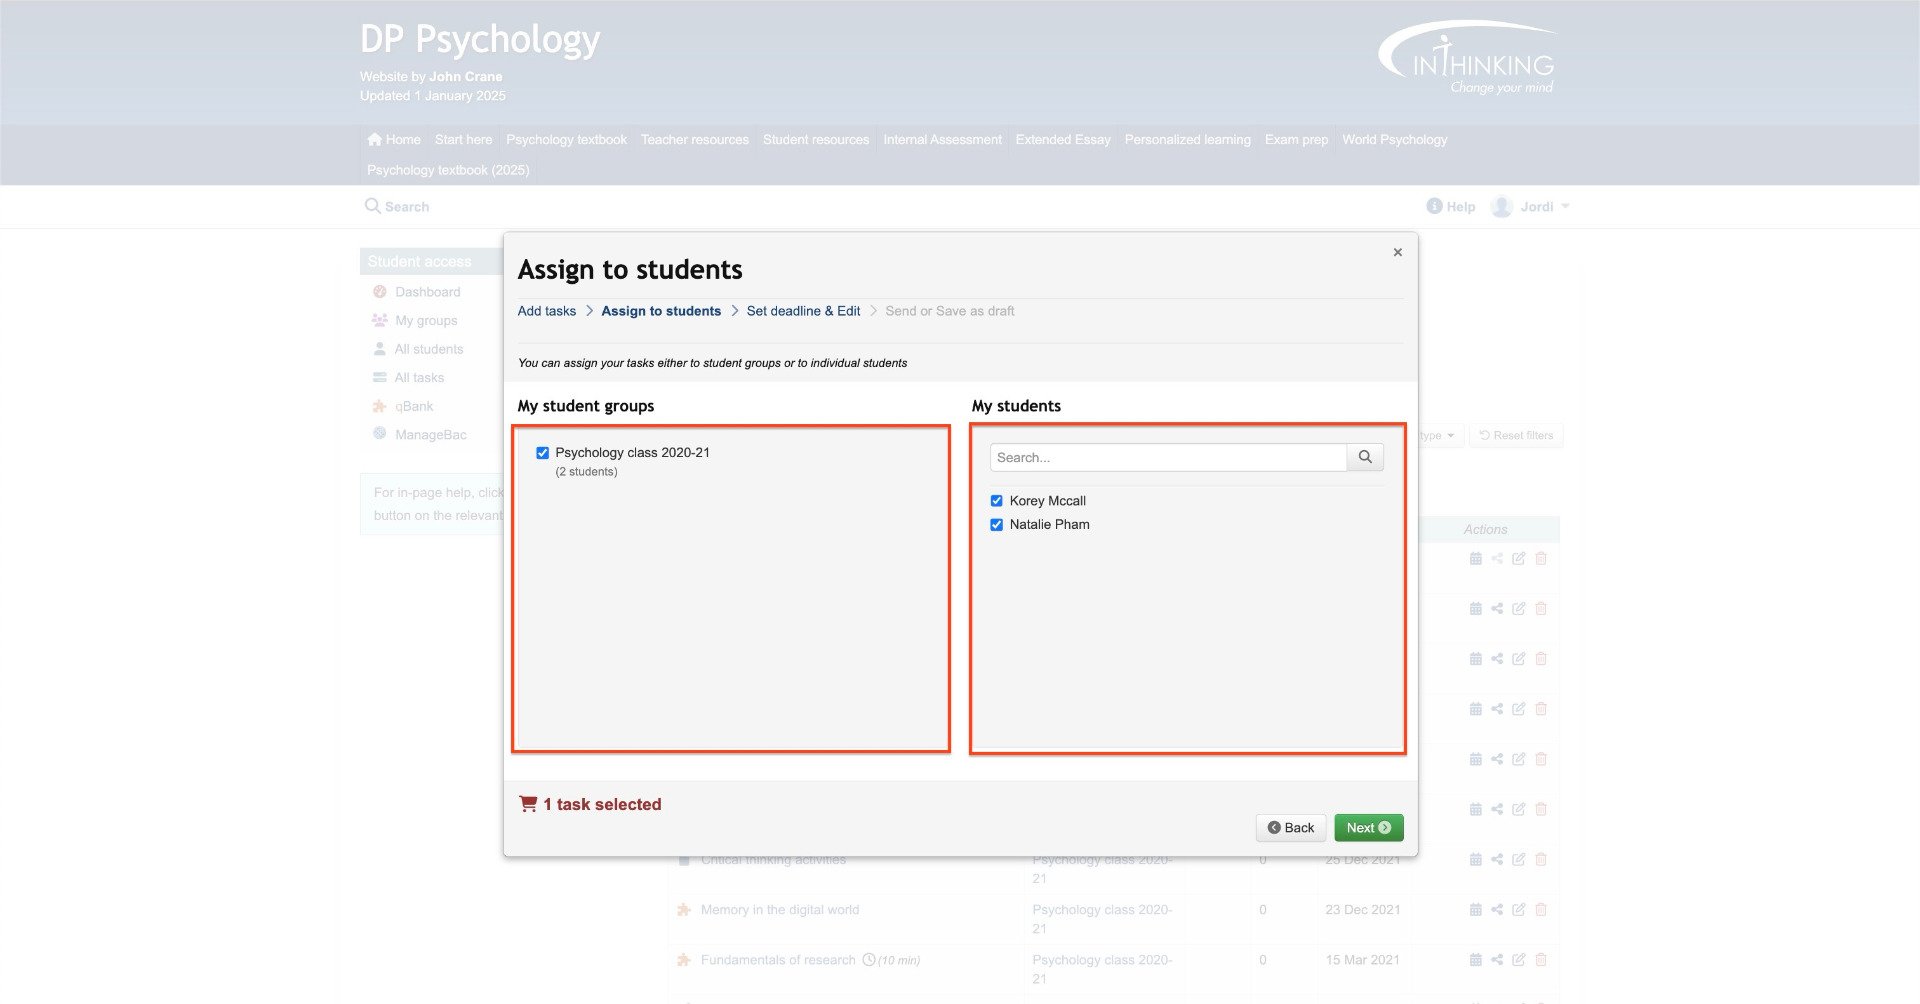
3. Set deadline & edit
The options immediately visible on this screen are:
- Select a common deadline
- Add optional instructions
- Reorder tasks
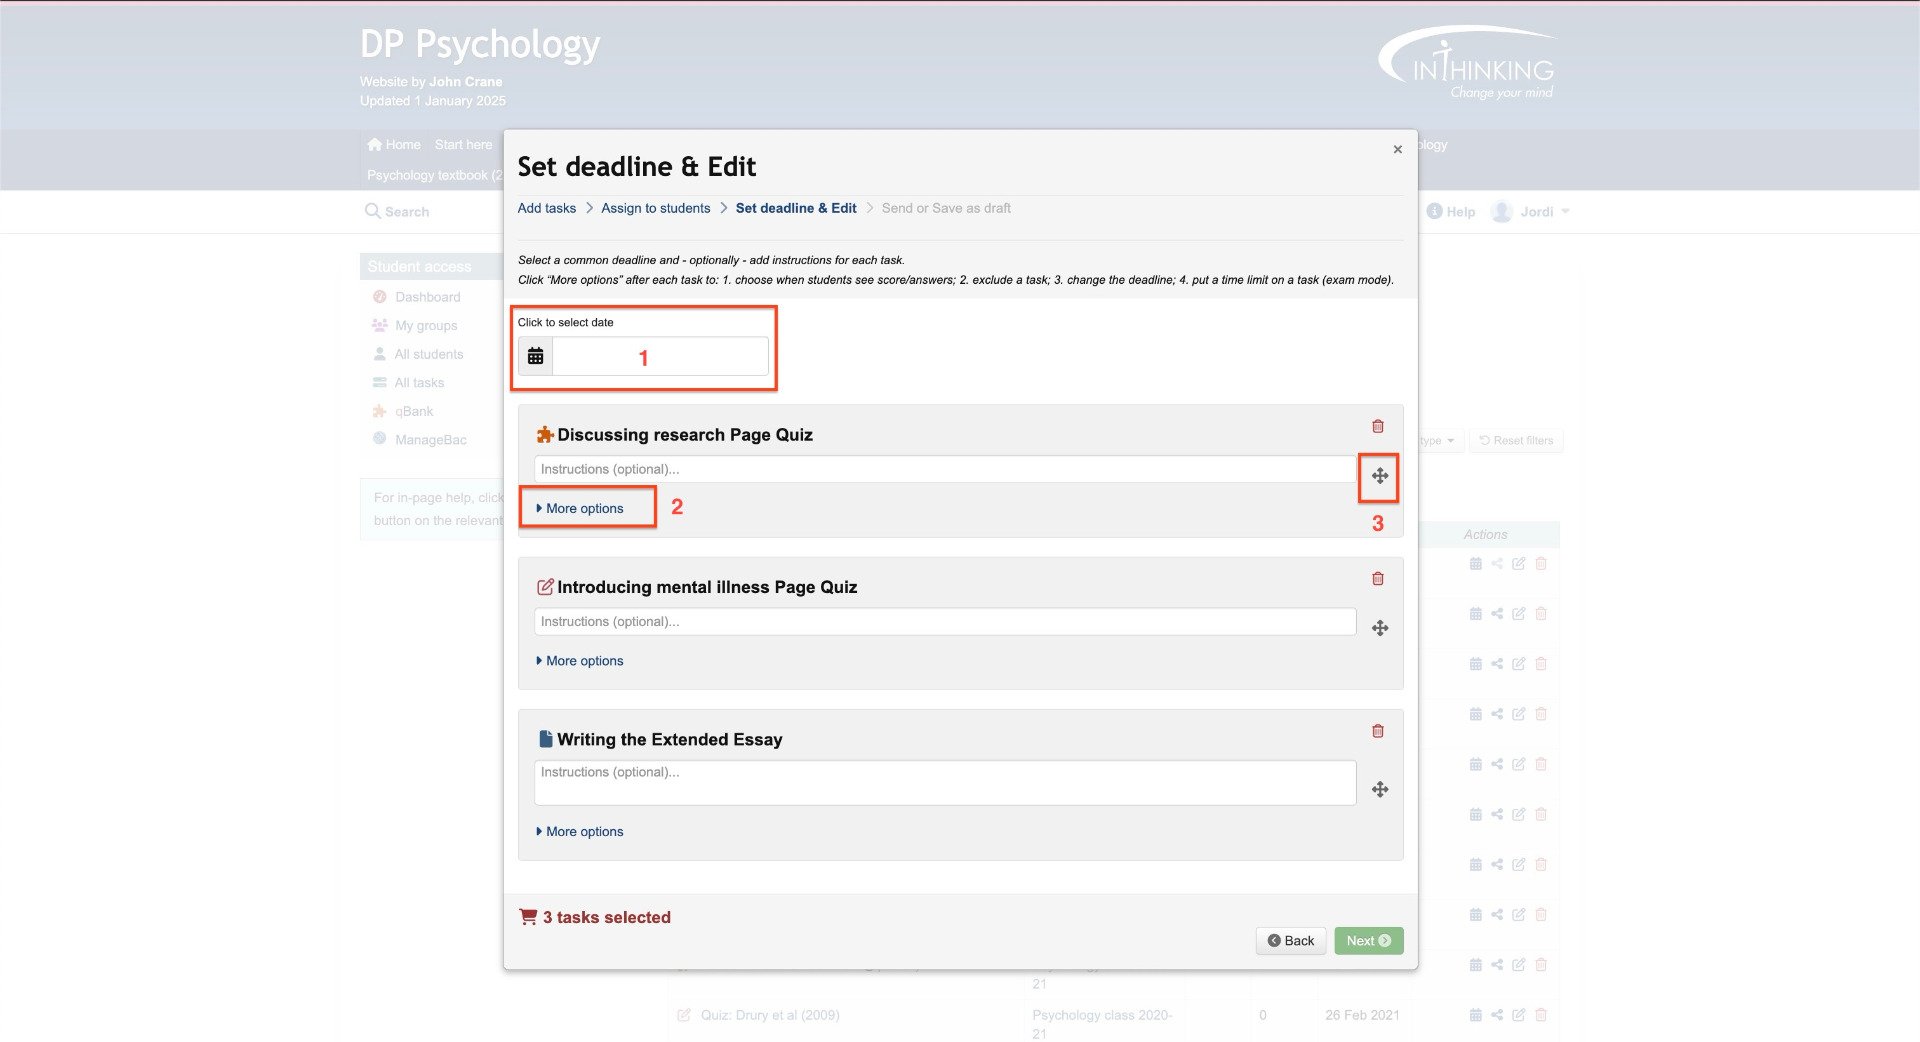
If you click "More options", you can also:
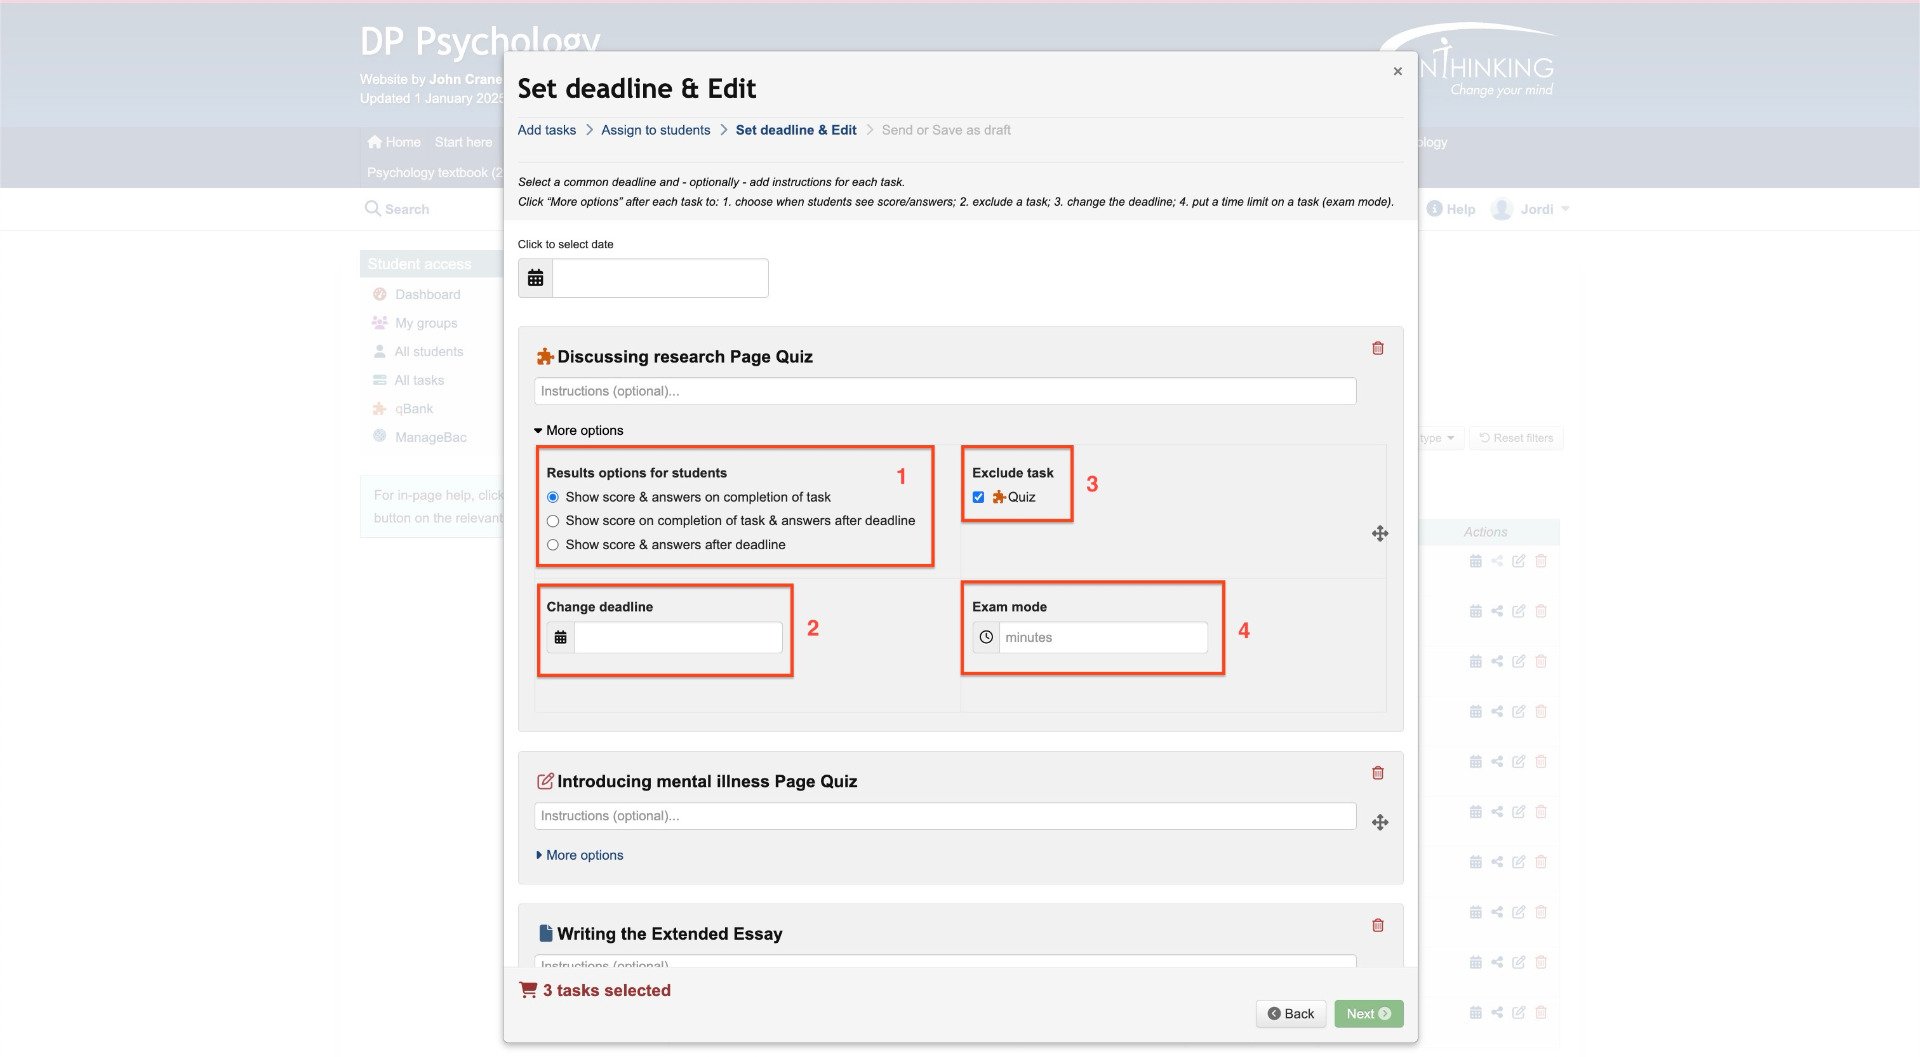
- Determine when the students see their score - and the answers - for a smart task (i.e. one which is graded automatically by the system).
- Change the deadline for one of the tasks if you are setting multiple tasks.
- Exclude a task if you only want the students to read the page in question, or if you want the task to be self-study so that the grades do not go into the grade book. (If a page contains several tasks you may only want students to choose one of them.)
- Set a time limit under "Exam mode" in which the task must be done.
4. Send or save as draft
Check the deadline, tasks, and recipients and then click either "Send" or "Save as draft".
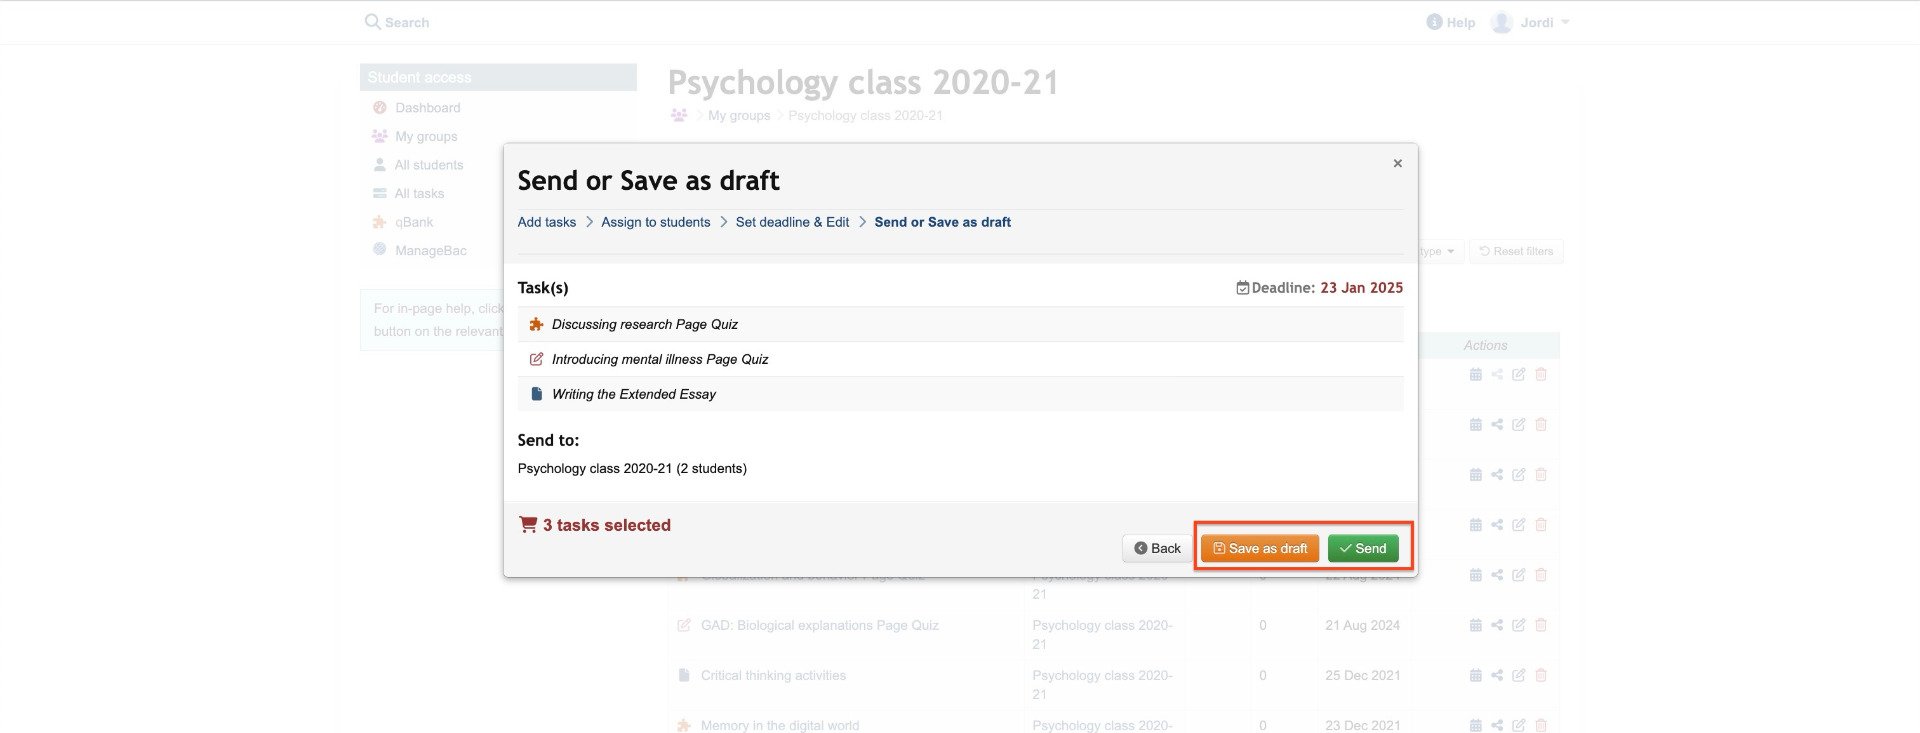
If you click "Send", your students will receive the task(s) on their Student pages dashboard at www.student.thinkib.net and it will appear on your "Active tasks" list both in "All tasks" and in the Task manager for the relevant group
If you click "Save as draft", the task(s) will appear on your "Draft tasks" list both in "All tasks" and in the Task manager for the relevant
